Hyundai i30 (PD): Maintenance / Brake/clutch fluid
Checking the brake/clutch fluid level
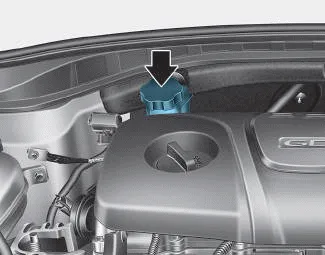
Check the fluid level in the reservoir periodically. The fluid level should be between MAX and MIN marks on the side of the reservoir.
Before removing the reservoir cap and adding brake/clutch fluid, clean the area around the reservoir cap thoroughly to prevent brake/clutch fluid contamination.
If the level is low, add fluid to the MAX level. The level will fall with accumulated mileage. This is a normal condition associated with the wear of the brake linings.
If the fluid level is excessively low, we recommend that the system be checked by a HYUNDAI authorised repairer.
Information
Use only the specified brake/clutch fluid. Refer to “Recommended lubricants and capacities” in chapter 8.
Information
Before removing the brake/clutch filler cap, read the warning on the cap.
Information
Clean the filler cap before removing. Use only DOT3 or DOT4 brake/clutch fluid from a sealed container.
WARNING
If the brake/clutch system requires frequent additions of fluid this could indicate a leak in the brake/clutch system. We recommend that the vehicle be inspected by a HYUNDAI authorised repairer.
WARNING
Do not allow brake/clutch fluid to come in contact with your eyes. If brake/clutch fluid comes in contact with your eyes, flush your eyes with clean water for at least 15 minutes and get immediate medical attention.
NOTICE
- Do not allow brake/clutch fluid to contact the vehicle's body paint, as paint damage will result.
- Brake/clutch fluid, which has been exposed to open air for an extended time should never be used as its quality cannot be guaranteed. It should be disposed of properly.
- Don't put in the wrong kind of fluid. A few drops of mineralbased oil, such as engine oil, in your brake/clutch system can damage system parts.
The high-pressure cooling system has a reservoir filled with year-round antifreeze coolant. The reservoir is filled at the factory. Check the antifreeze protection and coolant concentration level at least once a year, at the beginning of the winter season, and before travelling to a colder climate.
Checking the washer fluid level Check the fluid level in the washer fluid reservoir and add fluid if necessary. Plain water may be used if washer fluid is not available.
Other information:
Hyundai i30 (PD) 2018-2024 Owner's Manual: Smart Cruise Control Vehicleto- Vehicle Distance
To set Vehicle-to-Vehicle Distance When the Smart Cruise Control System is ON, you can set and maintain the distance from the vehicle ahead of you without pressing the accelerator or brake pedal. Each time the button is pressed, the vehicle to vehicle distance changes as follows: For example, if you drive at 56 mph (90 km/h),
Hyundai i30 (PD) 2018-2024 Owner's Manual: Interior light bulb replacement
Room lamp If the LED lamp does not operate, we recommend that you have the vehicle checked by a HYUNDAI authorised repairer. Map lamp, room lamp, vanity mirror lamp and luggage compartment lamp 1. Using a flat-head screwdriver, gently pry the lens from the interior light housing.
Categories
- Manuals Home
- Hyundai i30 Owners Manual
- LKA system operation
- Engine coolant
- Scheduled maintenance services
- New on site
- Most important about car
