Hyundai i-30: Hood / Hood Assembly
Components and components location
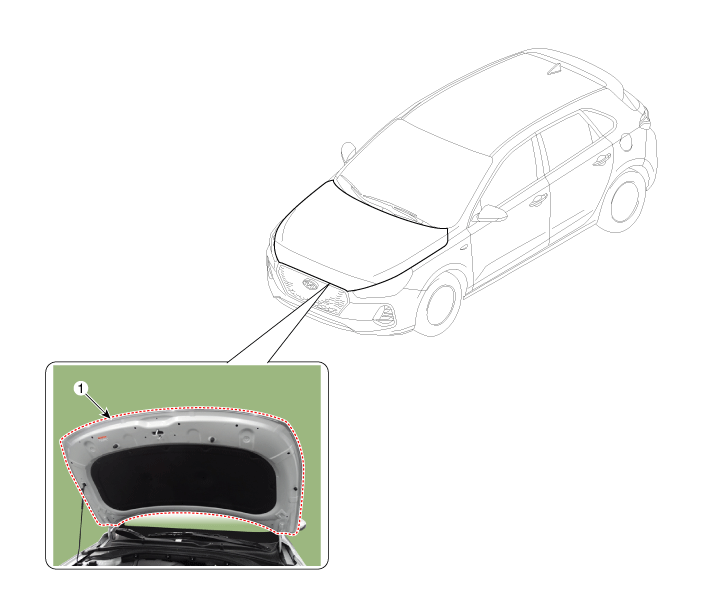
Repair procedures
| •
|
Be careful not to damage the hood and body.
|
|
| •
|
Removing or installing the hood requires an assistant.
|
| •
|
When removing the clips, use a clip remover.
|
|
|
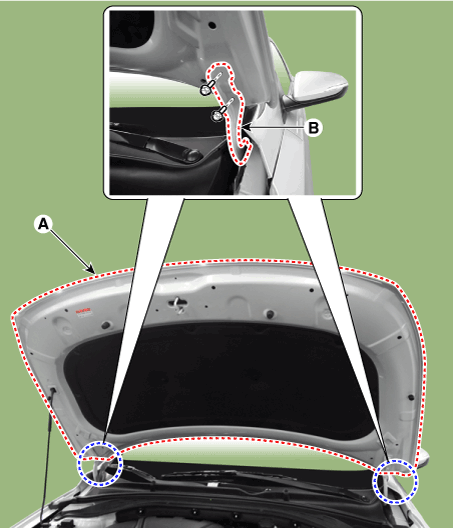
1. |
After loosening the hood hinge (B) mounting bolts, remove the hood assembly
(A).
|
Tightening torque :
21.6 - 26.5 N.m (2.2 - 2.7 kgf.m, 15.9 - 19.5 lb-ft)
|
|
|
2. |
To install, reverse removal procedure.
|
• |
Make sure the hood locks / unlocks and opens / closes
properly.
|
|
• |
Adjust the hood alignment.
|
|
|
Adjustment
1.
After loosening the hinge (A) mounting bolt, adjust the hood (B) by
moving it up and down or from side to side and tighten the bolt...
Repair procedures
Replacement
1.
Using a clip remover, remove the clips and then the hood insulator pad
(A).
•
Be careful not to scratch the hood panel...
Other information:
Components and components location
Components Location
1. Cluster lonizer
Description and operation
Description
The cluster ionizer makes disinfection and decomposition of bad smell from the
air-conditioner or inflow air...
Specifications
Specification
Items
Specification
High Pressure Fuel Line
bar
20 - 350
MPa
2 - 35
kgf/cm²
20.4 - 356...
Categories
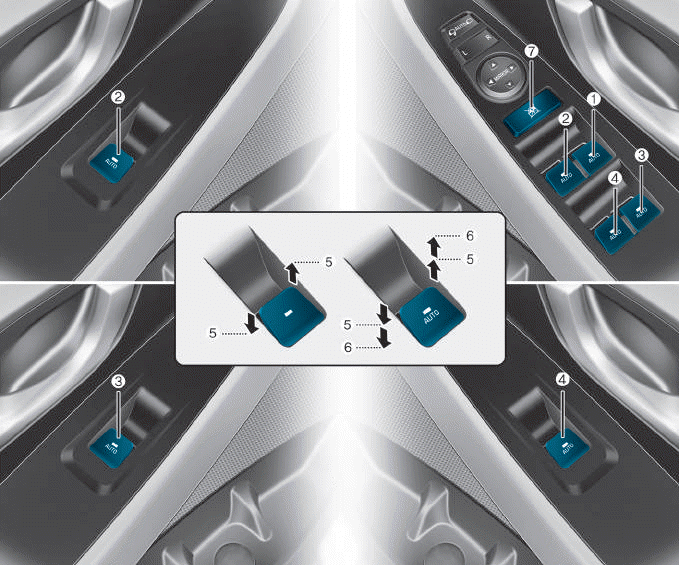
(1) Driver’s door power window
switch
(2) Front passenger’s door power
window switch
(3) Rear door (right) power window
switch
(4) Rear door (left) power window
switch
(5) Window opening and closing
(6) Automatic power window
(7) Power window lock switch
read more


 Repair procedures
 Hood Insulator Pad