Hyundai i-30: Mirrors / Outside rearview mirror
Be sure to adjust mirror angles before driving.
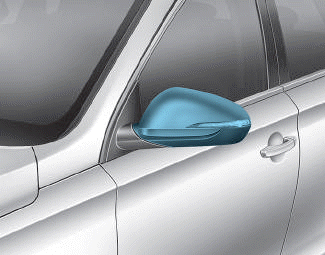
Your vehicle is equipped with both left-hand and right-hand outside rearview mirrors.
The mirror can be adjusted remotely with the remote switch.
The mirror heads can be folded to prevent damage during an automatic car wash or when passing through a narrow street.
WARNING
- The outside rearview mirror is convex. Objects seen in the mirror are closer than they appear.
- Use your interior rearview mirror or turn your head and look to determine the actual distance of following vehicles when changing lanes.
WARNING
Do not adjust or fold the outside rearview mirrors whilst driving. This may cause loss of vehicle control resulting in an accident.
NOTICE
- Do not scrape ice off the mirror face; this may damage the surface of the glass.
- If the mirror is jammed with ice, do not adjust the mirror by force. Use an approved spray de-icer (not radiator antifreeze) spray, or a sponge or soft cloth with very warm water, or move the vehicle to a warm place and allow the ice to melt.
Adjusting the rearview mirrors
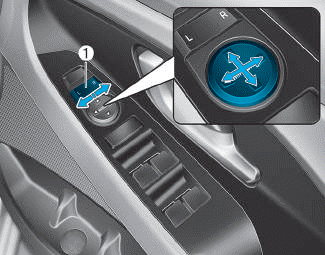
1. Press either the L (left side) or R (right side) button (1) to select the rearview mirror you would like to adjust.
2. Use the mirror adjustment control (2) to position the selected mirror up, down, left or right.
3. After adjustment, put the button into neutral (centre) position to prevent inadvertent adjustment.
NOTICE
- The mirrors stop moving when they reach the maximum adjusting angles, but the motor continues to operate whilst the switch is pressed. Do not press the switch longer than necessary, the motor may be damaged.
- Do not attempt to adjust the outside rearview mirror by hand otherwise the motor may be damaged.
Folding the outside rearview mirror
Manual type
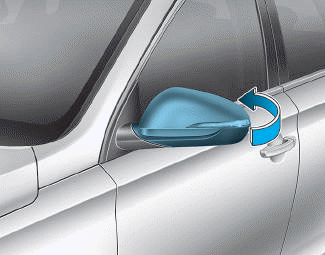
To fold the outside rearview mirror, grasp the housing of the mirror and then fold it toward the rear of the vehicle.
Electric type
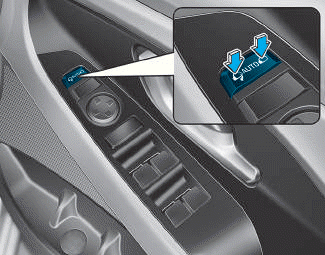
Left : The mirror will fold.
Right : The mirror will unfold.
Centre (AUTO) : The mirror will fold or unfold automatically as follows:
• Without smart key system
- The mirror will fold or unfold when the door is locked or unlocked by the remote key.
• With smart key system
- The mirror will fold or unfold when
the door is locked or unlocked by
the smart key.
- The mirror will fold or unfold when
the door is locked or unlocked by
the button on the outside door
handle.
NOTICE
The electric type outside rearview mirror operates even though the ignition switch is in the OFF position. However, to prevent unnecessary battery discharge, do not adjust the mirrors longer than necessary whilst the engine is not running.
NOTICE
Do not fold the electric type outside rearview mirror by hand. It could cause motor failure.
 Mirrors
Inside rearview mirror
Before you start driving, adjust the
rearview mirror to the centre on the
view through the rear window.
WARNING
Make sure your line of sight is
not obstructed...
 Reverse parking aid function
When you move the shift lever to the
R (Reverse) position, the outside
rearview mirror(s) will rotate downwards
to aid with driving in reverse...
Other information:
Hyundai i30 (PD) 2018-2025 Service Manual: Immobilizer Control Unit
Repair procedures Removal 1. Disconnect the negative (-) battery terminal. 2. Remove the main crash pad assembly. (Refer to Body - "Main Crash Pad Assembly") 3...
Hyundai i30 (PD) 2018-2025 Service Manual: Repair procedures
Removal 1. Disconnect the battery negative cable from the battery and then wait for at least 30 seconds. 2. Turn the steering wheel so that the front wheels are placed in the straight ahead position...
Categories
- Manuals Home
- 3rd Generation i30 Owners Manual
- 3rd Generation i30 Service Manual
- Front windscreen wiper service position
- Engine compartment
- Tyre pressure monitoring system
- New on site
- Most important about car
Seat belt warning light
Seat belt warning
Driver’s seat belt warning
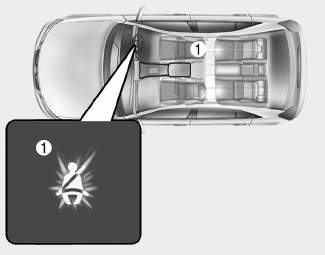
■ Instrument cluster
As a reminder to the driver, the seat belt warning light will illuminate for approximately 6 seconds each time you turn the ignition switch ON regardless of belt fastening.
