Hyundai i-30: Air Conditioning System / Condenser
Components and components location
| Components Location |
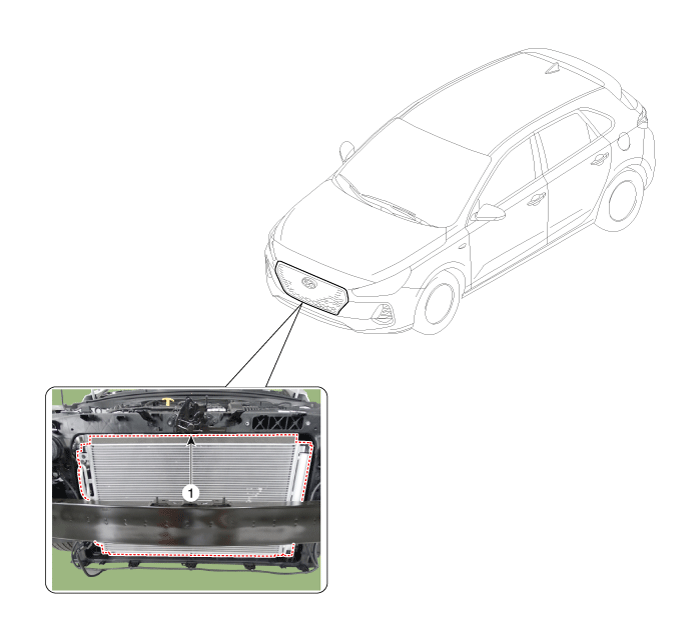
| 1. Condenser |
Repair procedures
| Inspection |
| 1. |
Check the condenser fins for clogging and damage. If clogged, clean
them with water, and blow them with compressed air. If bent, gently
bend them using a screwdriver or pliers.
|
| 2. |
Check the condenser connections for leakage, and repair or replace it,
if required.
|
| Replacement |
| 1. |
Recover the refrigerant with a recovery / recycling / charging station.
|
| 2. |
Disconnect the negative (-) battery terminal.
|
| 3. |
Remove the front bumper.
(Refer to Body - "Front Bumper Cover")
|
| 4. |
Remove the hood latch assembly.
(Refer to Body - "Hood Latch")
|
| 5. |
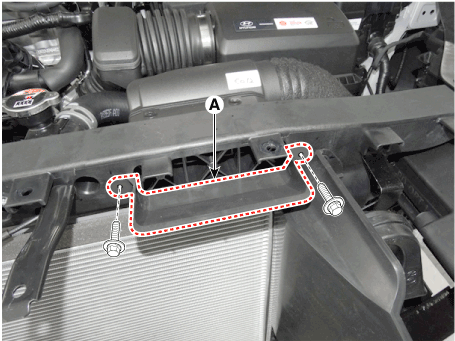
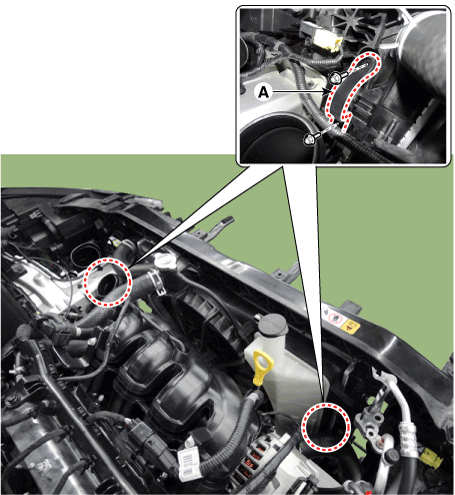
After loosening the mounting bolts, then remove the air duct bracket
(A).
|
| 6. |
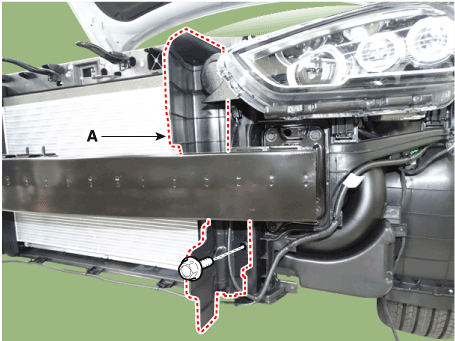
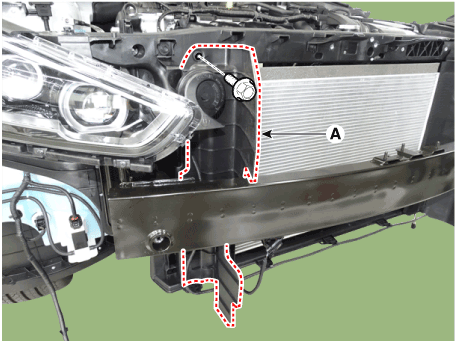
Remove the side air guard (A).
[LH]
[RH]
|
| 7. |
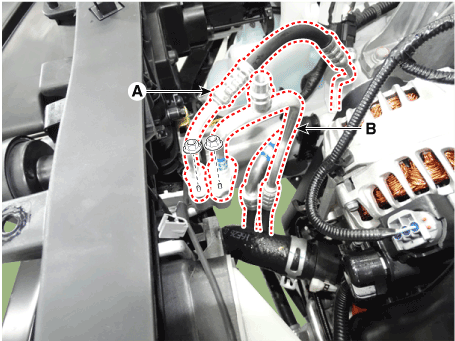
Remove the 2 nuts, and then disconnect the discharge line (A) and liquid
line (B) from the condenser.
|
| 8. |
After loosening the mounting bolts, then remove the radiator upper mounting
bracket (A).
|
| 9. |
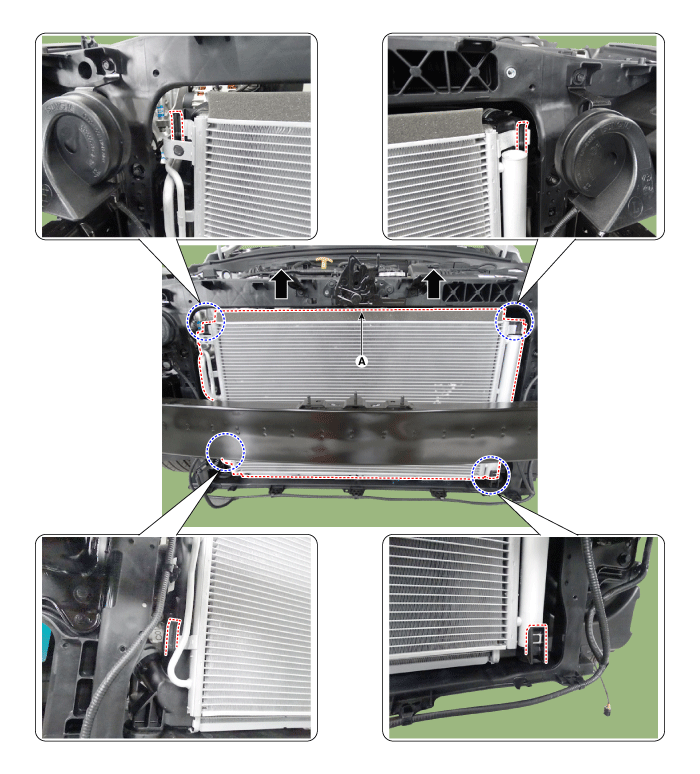
Remove the condenser (A) from radiator.
|
| 10. |
To install, reverse the removal procedure.
|
 Compressor
Description and operation
Description
The compressor is the power unit of the A/C system.
It is located on the side of engine block and driven by a V-belt of the engine...
 Receiver-Drier
Repair procedures
Replacement
1.
Remove the condenser.
2.
Remove the cap (A) on the bottom of the condenser with a L wrench...
Other information:
Hyundai i30 (PD) 2018-2025 Owner's Manual: Explanation of scheduled maintenance items
Engine oil and filter The engine oil and filter should be changed at the intervals specified in the maintenance schedule. If the vehicle is being driven in severe conditions, more frequent oil and filter changes are required. Drive belts Inspect all drive belts for evidence of cuts, cracks, excessive wear or oil saturation and replace if necessary...
Hyundai i30 (PD) 2018-2025 Owner's Manual: Bonnet
Opening the bonnet 1. Park the vehicle and set the parking brake. 2. Pull the release lever to unlatch the bonnet. The bonnet should pop open slightly. 3. Go to the front of the vehicle, raise the bonnet slightly, push the secondary latch up (1) inside of the bonnet centre and lift the bonnet (2)...
Categories
- Manuals Home
- 3rd Generation i30 Owners Manual
- 3rd Generation i30 Service Manual
- Theft-alarm system
- Front windscreen wiper service position
- Light bulbs
- New on site
- Most important about car
Warning light and message
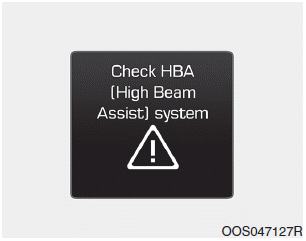
When the High Beam Assist (HBA)
System is not working properly, the
warning message will come on for a
few second. After the message disappears,
the master warning light ( )
will illuminate.
Copyright © 2025 www.hi30.net

