Hyundai i-30: Cooling System / Cooling Fan
Components and components location
| Components |
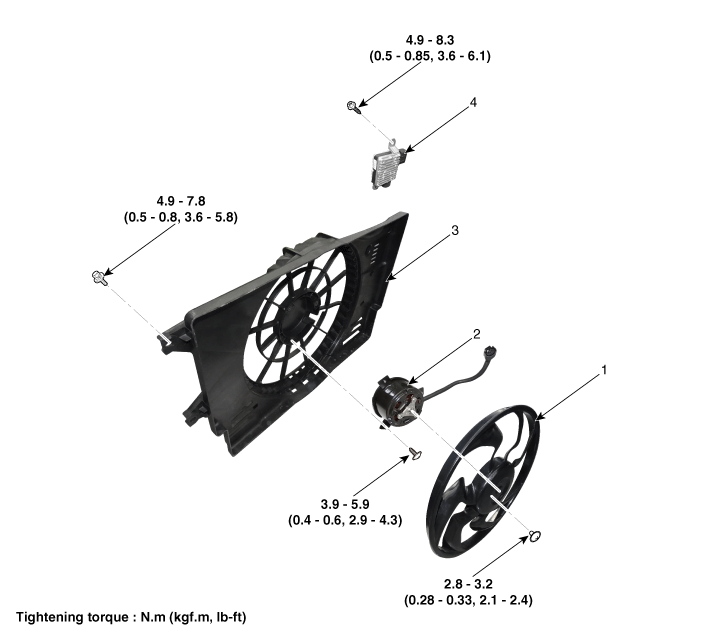
| 1. Cooling fan 2. Fan motor |
3. Cooling fan
shroud 4. Cooling fan controller (PWM) |
Repair procedures
| Removal and installation |
Cooling Fan
| 1. |
Disconnect the battery negative terminal.
|
| 2. |
Remove the air duct and air cleaner assembly.
(Refer to Intake and Exhaust System - "Air Cleaner)
|
| 3. |
Remove the engine room under cover.
(Refer to Engine and Transaxle Assembly - "Engine Room Under Cover")
|
| 4. |
Remove the intercooler outlet hose and pipe.
|
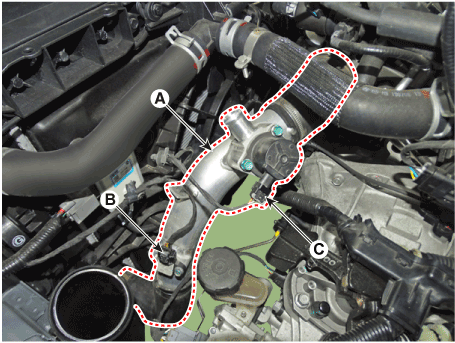

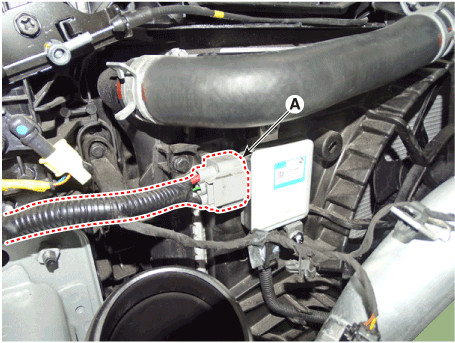
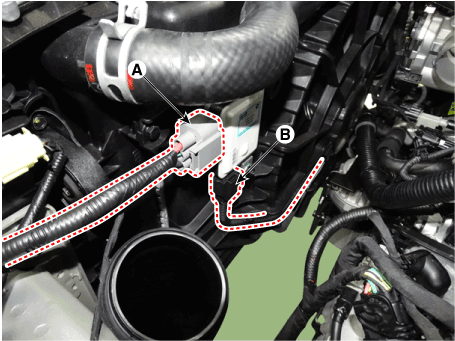
| 5. |
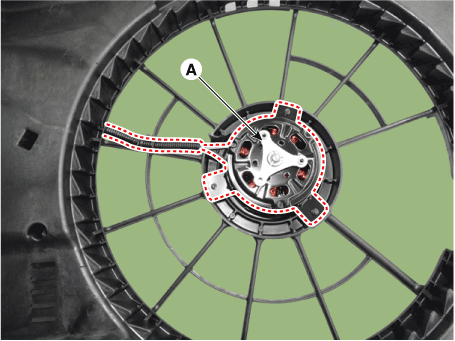
Disconnect the wire harness connector (A).
|
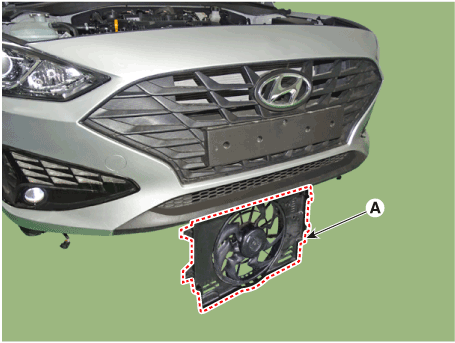
| 6. |
Loosen the cooling fan mounting bolts, and then remove the cooling fan
assembly (A).
|
| 7. |
Install in the reverse order of removal.
|
Cooling Fan Controller (PWM)
| 1. |
Disconnect the wire harness connector (A) and the fan motor connector
(B).
|
| 2. |
Remove the cooling fan controller (PWM) (A) from the cooling fan shroud.
|
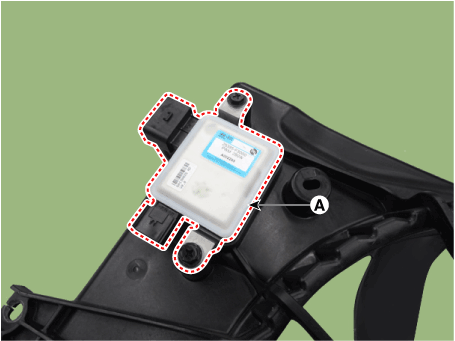
| 3. |
Install in the reverse order of removal.
|
| Disassembly |
| 1. |
Remove the cooling fan (A) from the cooling fan assembly.
|
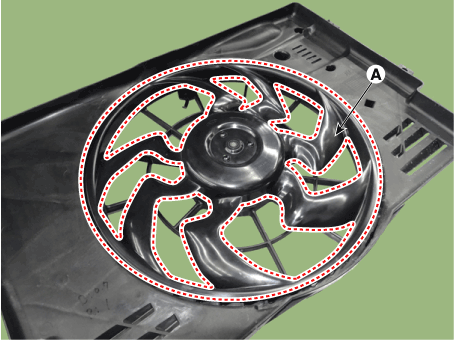
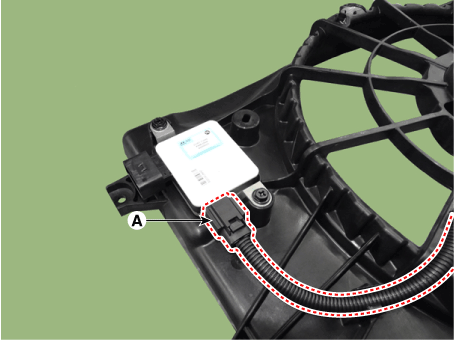
| 2. |
Disconnect the fan motor connector (A) from the cooling fan controller
(PWM).
|
| 3. |
Loosen the screws and then remove the fan motor (A) from the cooling
fan shroud.
|
| 4. |
Assemble in the reverse order of disassembly.
|
| Inspection |
Fan Motor
| 1. |
Disconnect the fan motor connector from the cooling fan controller (PWM).
|
| 2. |
Connect the battery voltage to the "+" terminal and ground to "-" terminal.
|
| 3. |
Check the cooling fan motor operates well.
|
 Coolant
Repair procedures
Replacement and Air Bleeding
•
Never remove the reservoir tank cap when the engine is hot...
 Radiator
Components and components location
Components
1. Radiator assembly
2. Mounting insulator
3. Radiator upper mounting bracket
4...
Other information:
Hyundai i30 (PD) 2018-2025 Service Manual: Components and components location
Components (1) 1. Crash pad assembly 2. Crash pad side cover [LH] 3. Crash pad side cover [RH] 4. Crash pad lower panel 5. Steering column shroud lower panel Componets (2) 1...
Hyundai i30 (PD) 2018-2025 Owner's Manual: Tyres and wheels
WARNING Tyre failure may cause loss of vehicle control resulting in an accident. To reduce risk of SERIOUS INJURY or DEATH, take the following precautions: Inspect your tyres monthly for proper inflation as well as wear and damage. The recommended cold tyre pressure for your vehicle can be found in this manual and on the tyre label located on the driver’s side centre pillar...
Categories
- Manuals Home
- 3rd Generation i30 Owners Manual
- 3rd Generation i30 Service Manual
- FCA sensor
- Auto door lock/unlock features
- Tyre pressure monitoring system
- New on site
- Most important about car
Turn signals and lane change signals
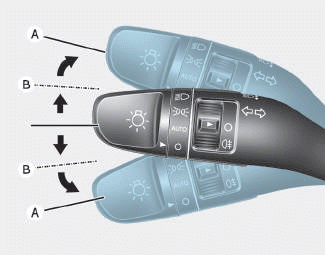
To signal a turn, push down on the lever for a left turn or up for a right turn in position (A). To signal a lane change, move the turn signal lever slightly and hold it in position (B).The lever will return to the OFF position when released or when the turn is completed.

Copyright © 2025 www.hi30.net