Hyundai i-30: Floor Console / Floor Console Assembly
Hyundai i30 (PD) 2018-2025 Service Manual / Body (Interior and Exterior) / Floor Console / Floor Console Assembly
Components and components location
| Component Location |
| [General console] |
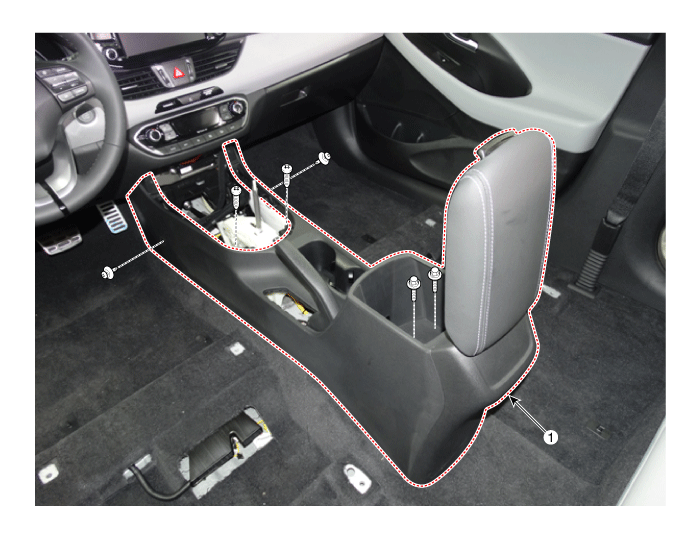
| 1. Floor console
assembly |
| [EPB console] |
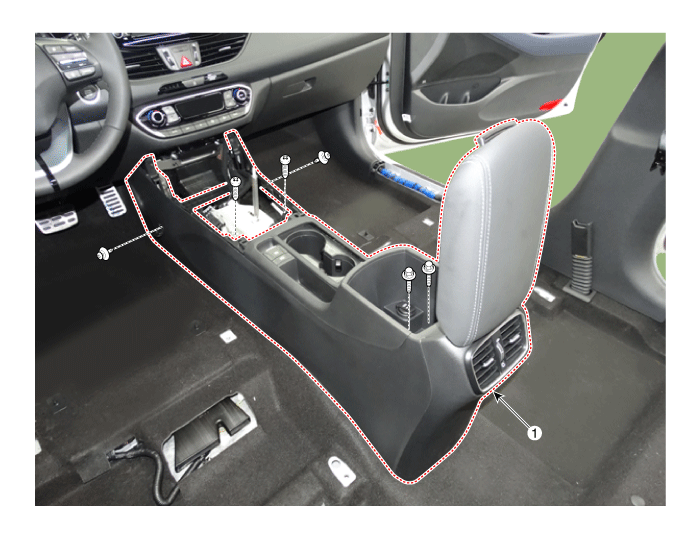
| 1. Floor console
assembly |
Repair procedures
| Replacement |
| [General console] |
|

|
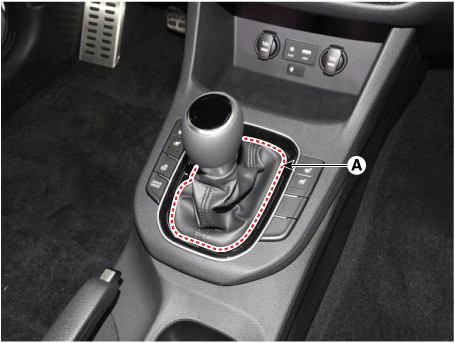
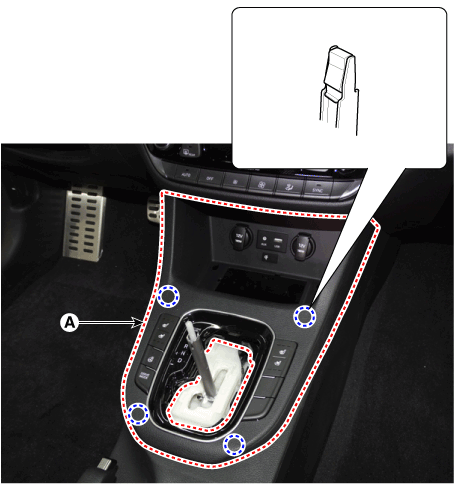
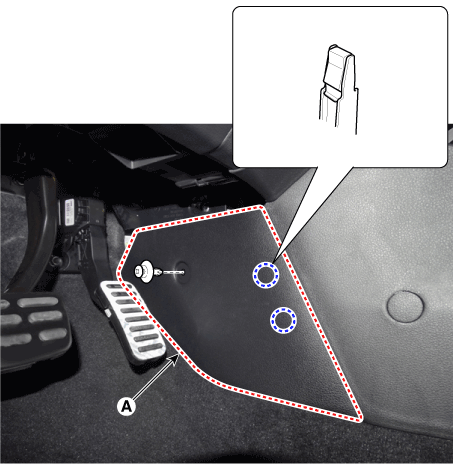
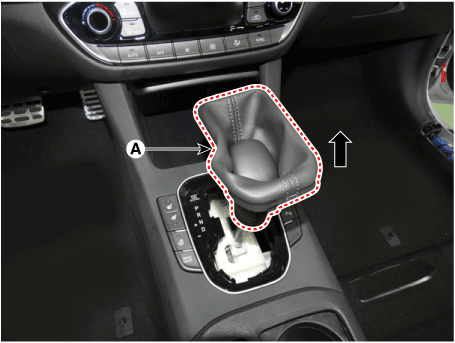
| 1. |
Remove the gear knob & boots (A) after turning in the counter clock-wise
direction.
|
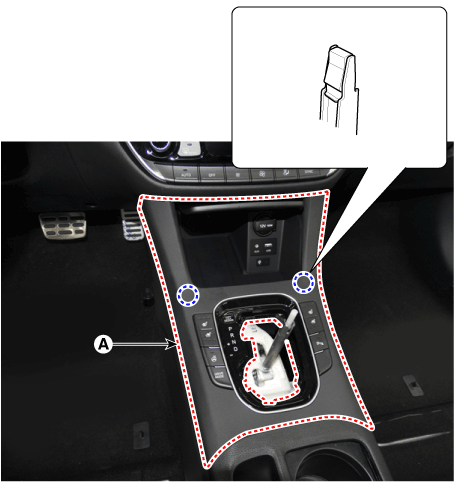
| 2. |
Using a screwdriver or remover, remove the console upper cover (A).
|
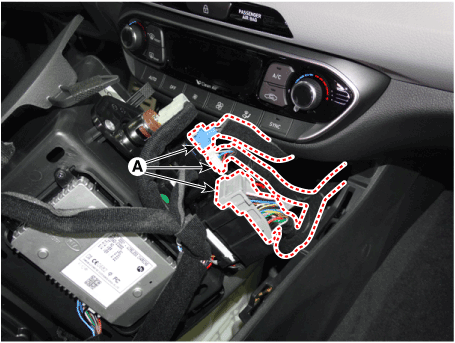
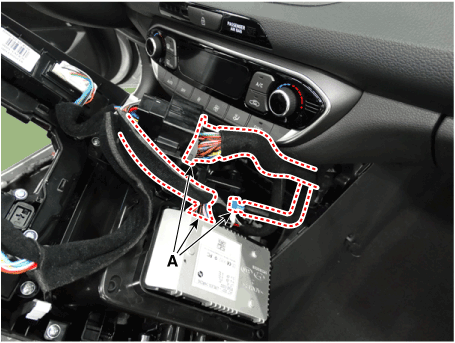
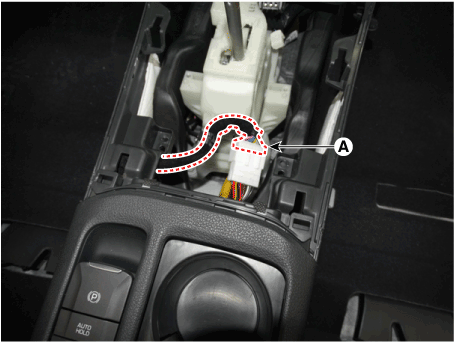
| 3. |
Disconnect the connector (A).
|
| 4. |
Using a screwdriver or remover, remove the parking brake cover (A).
|
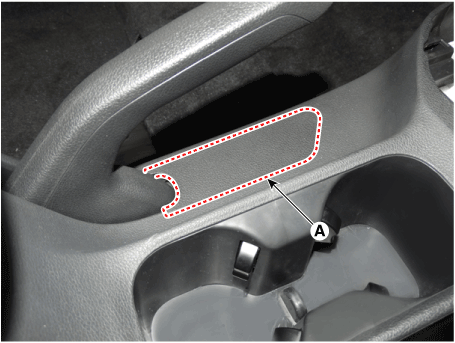
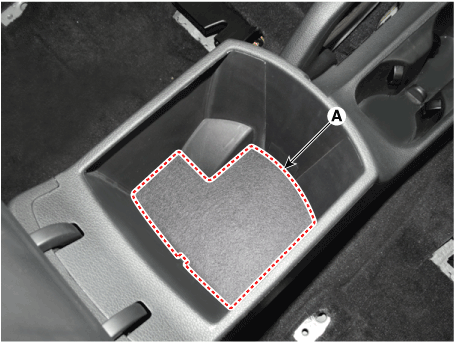
| 5. |
Remove the storage box pad (A).
|
| 6. |
Using a screwdriver or remover, remove the console side cover (A).
[LH]
[RH]
|
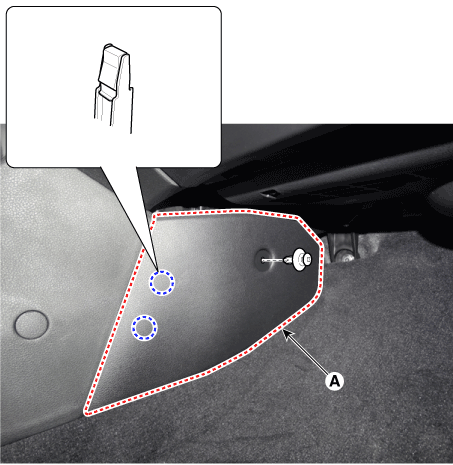
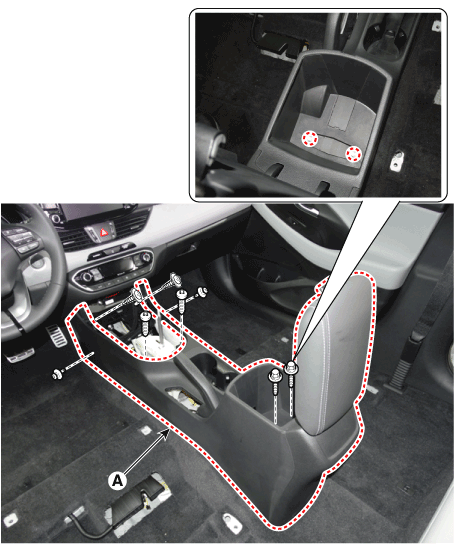
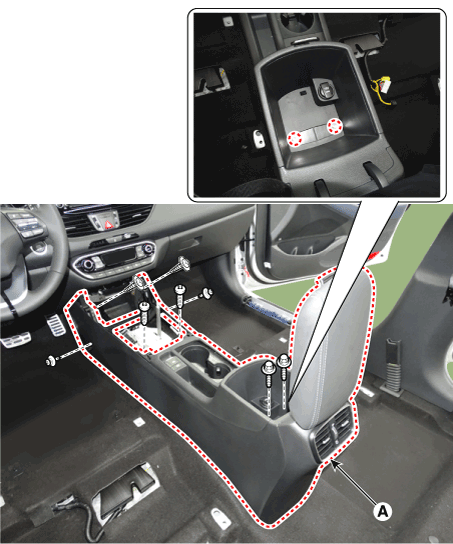
| 7. |
After loosening the mounting screws and bolts, remove the console rear
complete assembly (A).
|
| 8. |
To install, reverse removal procedure.
|

| [EPB console] |
|
|

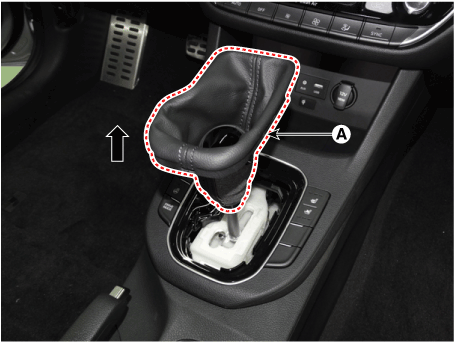
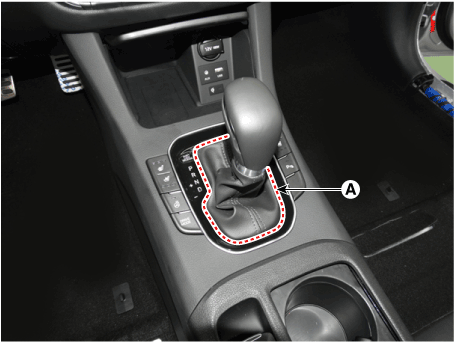
| 1. |
To remove the gear knob & gear boots (A) pull both of it up.
|
| 2. |
Using a screwdriver or remover, remove the floor console upper cover
(A).
|
| 3. |
Disconnect the connectors (A) from the floor console upper cover.
|
| 4. |
Remove the storage box pad (A).
|
| 5. |
After loosening the mounting screws and bolts, remove the floor console
assembly (A).
|
| 6. |
Disconnect the EPB connector (A).
|
| 7. |
To install, reverse removal procedure.
|
 Components and components location
Components
[General console]
1. Console center
mounting bracket [AT]
2. Console center mounting bracket [MT]
3...
 Rear Console Cover
Components and components location
Component Location
1. Rear console
cover
Repair procedures
Replacement
•
Put on gloves to prevent hand injuries...
Other information:
Hyundai i30 (PD) 2018-2025 Service Manual: Description and operating principle
Description and Operation Wireless Power Charger System During ACC or IG ON, battery voltage is supplied to the wireless power charger system to transmit an output of 5 W to mobile phone. Mobile phones certified with the wireless charging standard WPC (Qi 1...
Hyundai i30 (PD) 2018-2025 Service Manual: Rear Seat Assembly
Components and components location Component Location 1. Rear seat cushion assembly 2. Rear seat back assembly Repair procedures Replacement [Rear seat cushion assembly] 1...
Categories
- Manuals Home
- 3rd Generation i30 Owners Manual
- 3rd Generation i30 Service Manual
- Scheduled maintenance services
- FCA sensor
- LKA system operation
- New on site
- Most important about car
Warning light and message
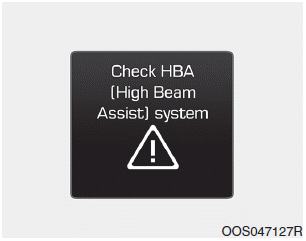
When the High Beam Assist (HBA)
System is not working properly, the
warning message will come on for a
few second. After the message disappears,
the master warning light ( )
will illuminate.
)
will illuminate.

Copyright © 2025 www.hi30.net