Hyundai i-30: Front Door / Front Door Window Glass
Hyundai i30 (PD) 2018-2025 Service Manual / Body (Interior and Exterior) / Front Door / Front Door Window Glass
Components and components location
| Component Location |
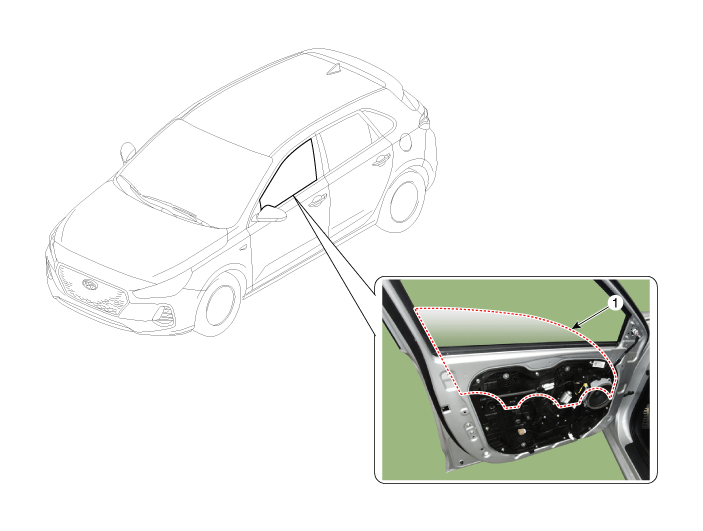
| 1. Front door
window glass |
Repair procedures
| Replacement |
| 1. |
Remove the front door trim.
(Refer to Front Door - "Front Door Trim")
|
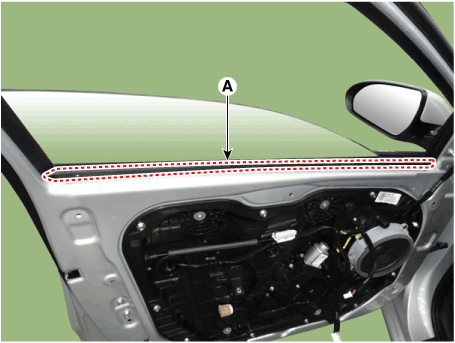
| 2. |
Remove the front door belt inside weatherstrip (A).
|
| 3. |
Separate the mounting plug hole (A) from the front door module.
|
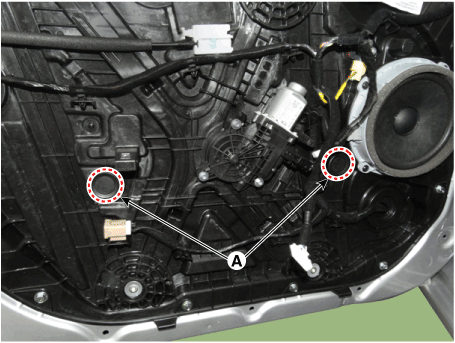
| 4. |
Lower the glass by operating the power window switch until the glass
mounting bolt is exposed in the plug hole.
|


| 5. |
After loosening the glass mounting bolts, adjust the spacing of the
glass (A) by moving the glass from side to side and then tighten the
bolts.
|

| 6. |
To install, reverse removal procedure.
|
 Front Door Inside Handle
Repair procedures
Replacement
1.
Remove the front door trim.
(Refer to Front Door - "Front Door Trim")
2...
 Front Door Module
Components and components location
Component Location
1. Front door
module
Repair procedures
Replacement
1...
Other information:
Hyundai i30 (PD) 2018-2025 Owner's Manual: Wiper blades
Blade inspection Contamination of either the windscreen or the wiper blades with foreign matter can reduce the effectiveness of the windscreen wipers. Common sources of contamination are insects, tree sap, and hot wax treatments used by some commercial car washes...
Hyundai i30 (PD) 2018-2025 Service Manual: Repair procedures
Removal [Manual Transaxle Type] 1. Turn ignition switch OFF and disconnect the negative (-) battery cable. 2. Remove the air duct and air cleaner assembly. (Refer to Engine Mechanical System - "Air Cleaner") 3...
Categories
- Manuals Home
- 3rd Generation i30 Owners Manual
- 3rd Generation i30 Service Manual
- Engine compartment
- Brake/clutch fluid
- Trip computer
- New on site
- Most important about car
Power windows
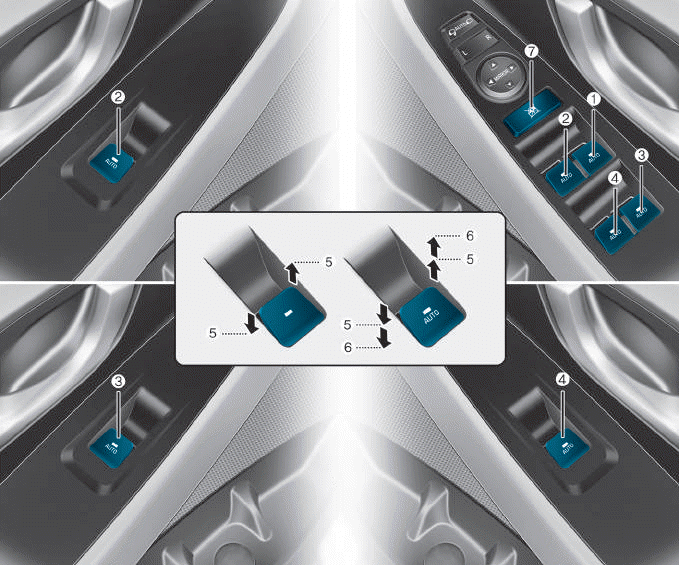
(1) Driver’s door power window
switch
(2) Front passenger’s door power
window switch
(3) Rear door (right) power window
switch
(4) Rear door (left) power window
switch
(5) Window opening and closing
(6) Automatic power window
(7) Power window lock switch

Copyright © 2025 www.hi30.net