Hyundai i-30: Panorama sunroof / Panorama Sunroof Assembly
Repair procedures
| •
|
In order to remove panorama sunroof assembly use tools as follows.
[Tools block diagram]
① Square wire
② Insert type wire grip
[Tools assembly diagram]
|
| •
|
Tighten square wire ① inserting it in the hole of Insert type
wire grip ②
|
|
|
1. |
Remove the roof side moulding.
|
|
3. |
Remove the front glass.
|
|
4. |
Completely close the movable glass using the panorama sunroof switch.
|
|
5. |
Remove the window glass.
|
|
6. |
Loosen the bolt (A) on the side bracket of the panorama sunroof.
|
Tightening torque :
19.6 - 29.4 N.m (2.0 - 3.0 kgf.m, 14.5 - 21.7 lb-ft)
|
|
|
7. |
Loosen the panorama sunroof mounting nuts (A).
[Front]
|
Tightening torque :
9.8 - 14.7 N.m (2 - 3 kgf.m, 7.2 - 10.8 lb-ft)
|
[Rear]
|
Tightening torque :
9.8 - 14.7 N.m (2 - 3 kgf.m, 7.2 - 10.8 lb-ft)
|
|
|
8. |
Cut sealant in edge side front (A) pulling wire (B) from left to right.
|
• |
Wear gloves not to get hurt in the hand.
|
|
• |
Be careful not to be burned in the hand by too much
heat using wire.
|
|
• |
Work carefully because wire can be cut.
|
|
|
• |
Use protective tape when removing parts with screw driver
or remover not to damage the parts.
|
|
• |
Give attention not to damage body.
|
|
|
• |
More than two people should work together when using
wire.
|
|
|
|
9. |
Cut sealant between edge side front (A-A) pulling wire (B) from left
to right.
|
• |
Wear gloves not to get hurt in the hand.
|
|
• |
Be careful not to be burned in the hand by too much
heat using wire.
|
|
• |
Work carefully because wire can be cut.
|
|
|
• |
Use protective tape when removing parts with screw driver
or remover not to damage the parts.
|
|
• |
Give attention not to damage body.
|
|
|
• |
More than two people should work together when using
wire.
|
|
|
|
10. |
Cut sealant between edge side (A-A) pulling wire (B) from left to right.
|
• |
Wear gloves not to get hurt in the hand.
|
|
• |
Be careful not to be burned in the hand by too much
heat using wire.
|
|
• |
Work carefully because wire can be cut.
|
|
|
• |
Use protective tape when removing parts with screw driver
or remover not to damage the parts.
|
|
• |
Give attention not to damage body.
|
|
|
• |
More than two people should work together when using
wire.
|
|
|
|
11. |
Cut sealant between edge side rear (A-A) pulling wire (B) from left
to right.
|
• |
Wear gloves not to get hurt in the hand.
|
|
• |
Be careful not to be burned in the hand by too much
heat using wire.
|
|
• |
Work carefully because wire can be cut.
|
|
|
• |
Use protective tape when removing parts with screw driver
or remover not to damage the parts.
|
|
• |
Give attention not to damage body.
|
|
|
• |
More than two people should work together when using
wire.
|
|
|
|
12. |
After every edge side sealant is cut, remove panorama sunroof assembly
(A).
|
• |
When removal of the panorama sunroof assembly be careful
not to damage.
|
|
|
|
13. |
Use a blade to cut off residual sealant (A) around body panel.
|
• |
When cutting off the residual sealant around the body
panel, make sure to leave about the thickness of 2 mm
from the adhesive surface.
|
|
|
• |
Make sure that the body paint surface is not damaged
at all.
|
|
• |
If it is damaged, apply paint or rust inhibitor for
maintenance.
|
|
|
| •
|
In order to install panorama sunroof assembly use tools as follows.
[Tools block diagram]
① Sealant nozzle
② Adhesive sealant only for glass
③ Sealant gun
|
|
|
1. |
Use alcohol or an air gun to clean up the edges of the body panel and
the panorama sunroof.
|
|
2. |
Use a sealant gun to apply sealant (A) around body panel.
|
• |
When using a sealant gun to apply the sealant, make
sure that the sealant is not cracked to prevent water
leaks.
|
|

|
|
3. |
Carefully install panorama sunroof on body flange set by centering device
hole (A).
|
|
4. |
Check steps and gaps for every side.
|
|
5. |
Tighten panorama sunroof fixing nuts.
|
Tightening torque : 2.0 - 3.0 kgf.m
|
|
|
6. |
Install the rear window glass.
|
|
7. |
Perform water leak test.
|
• |
Avoid water flow to touch adhesive surface directly
and let water flow to side of the glass.
|
|
|
|
8. |
If water leak occurs, apply sealant on leakage spot.
|
• |
After panorama sunroof is installed vehicle should be
parked on flat place 4 hours at least.
|
|
• |
If vehicle should be run, drive slowly within 8 hours
at least.
|
|
• |
Have driver give attention to avoide violent drive or
drive ununiform road for 2 - 3 days.
|
|
|
|
9. |
Install the front glass.
|
|
10. |
Install the roof trim.
|
|
11. |
Installe the roof side moulding.
|
Repair procedures
Replacement
1.
Remove the roof trim.
(Refer to Roof Trim - "Roof Trim Assembly")
2...
Repair procedures
Removal
1.
Remove the movable glass.
(Panorama sunroof - refer "movable glass")
2...
Other information:
Automatic transmission operation
The automatic transmission has six
forward speeds and one reverse
speed.
The individual speeds are selected
automatically in the D (Drive) position.
WARNING
To reduce the risk of serious
injury or death:
ALWAYS check the surrounding
areas near your vehicle for
people, especially children,
before shifting a vehicle into
D (Drive) or R (Reverse)...
Components and components location
Component Location
1. Front door
window glass
Repair procedures
Replacement
1.
Remove the front door trim.
(Refer to Front Door - "Front Door Trim")
2...
Categories
Seat belt warning
Driver’s seat belt warning
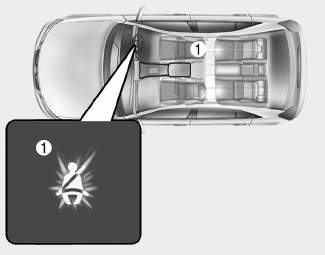
■ Instrument cluster
As a reminder to the driver, the seat
belt warning light will illuminate for
approximately 6 seconds each time
you turn the ignition switch ON
regardless of belt fastening.
read more


 Roller Blind
 Panorama Sunroof Frame Weatherstrip