Hyundai i-30: Body Side Molding / Rear Wheel Guard
Repair procedures
| •
|
Put on gloves to prevent hand injuries.
|
|
| •
|
When removing with a flat-tip screwdriver or remover, wrap protective
tape around the tools to prevent damage to components.
|
| •
|
Take care not to scratch the body surface.
|
|
|
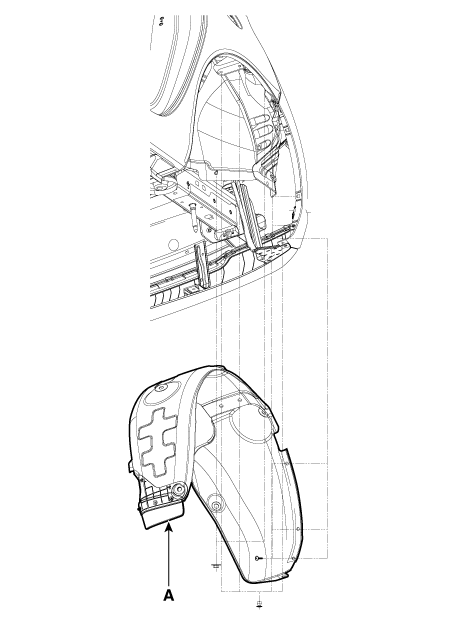
2. |
After loosening the mounting screws and nut, remove the rear wheel guard
(A).
|
|
3. |
To install, reverse removal procedure.
|
• |
Replace any damaged clips (or pin-type retainers).
|
|
|
Repair procedures
Replacement
•
Put on gloves to prevent hand injuries...
Repair procedures
Replacement
•
Put on gloves to prevent hand injuries...
Other information:
■ Front radar
■ Front camera
In order for the FCA system to operate
properly, always make sure the
sensor cover or sensor is clean and
free of dirt, snow, and debris. Dirt,
snow, or foreign substances on the
sensor cover or sensor may adversely
affect the sensing performance of
the sensor...
Repair procedures
Removal
1.
Loosen the wheel nuts slightly.
Raise the vehicle, and make sure it is securely supported.
2.
Remove the front wheel and tire (A) from the front hub...
Categories
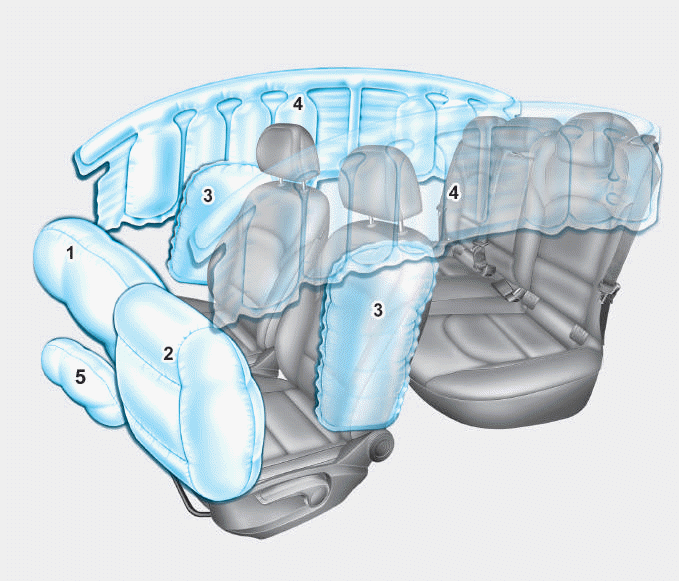
1. Driver’s front air bag
2. Passenger’s front air bag
3. Side air bag*
4. Curtain air bag*
5. Knee air bag*
6. Front passenger air bag ON/OFF
switch
read more


 Front Wheel Guard
 Front Mud Guard