Hyundai i-30: Windshield Glass / Repair procedures
Hyundai i30 (PD) 2018-2025 Service Manual / Body (Interior and Exterior) / Windshield Glass / Repair procedures
| Replacement |
[Removal]
|

|

| 1. |
Remove the roof side molding.
(Refer to Interior Trim - "Roof Side Molding")
|
| 2. |
Remove the inside rear view mirror assembly.
(Refer to Mirror - "Inside Rear View Mirror")
|
| 3. |
Remove the front pillar trim.
(Refer to Interior Trim - "Front Fillar Trim")
|
| 4. |
Remove the cowl top cover.
(Refer to "Cowl Top Cover")
|
| 5. |
Using a screwdriver or remover, remove the windshield side molding (A).
|
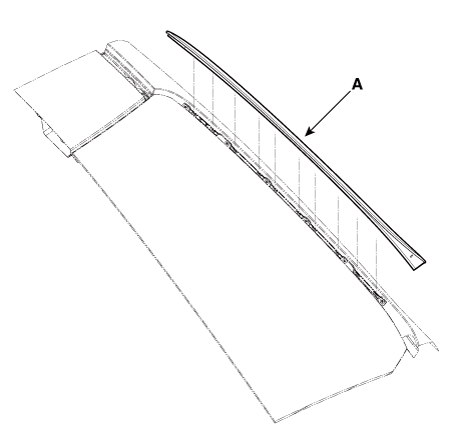
| 6. |
Using a cutter (A) knife, carefully remove the windshield glass molding.
|

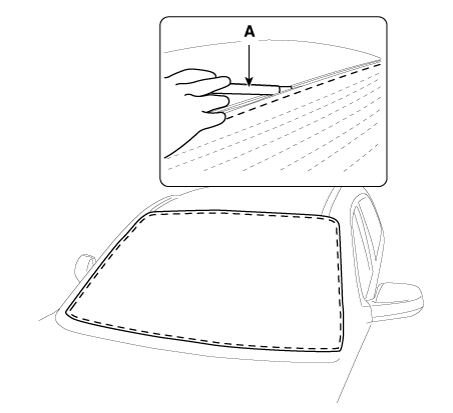
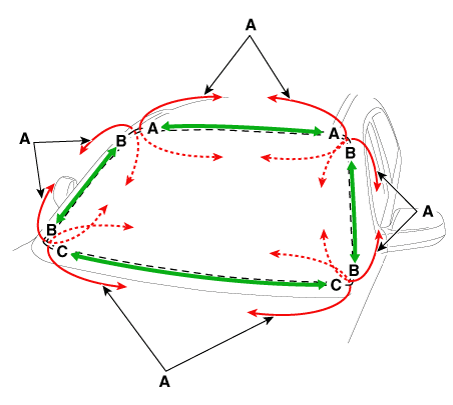
| 7. |
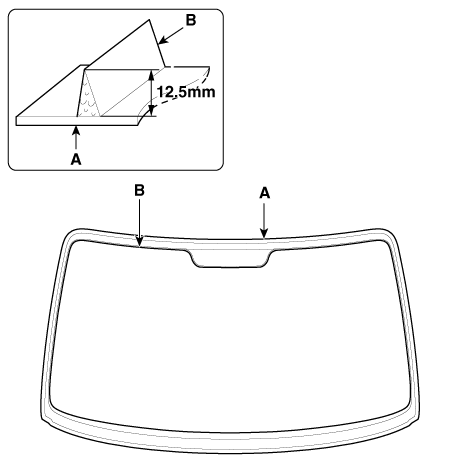
Cut off the sealant on the edge (B) while pulling the piano wire (A)
to the left and right.
|
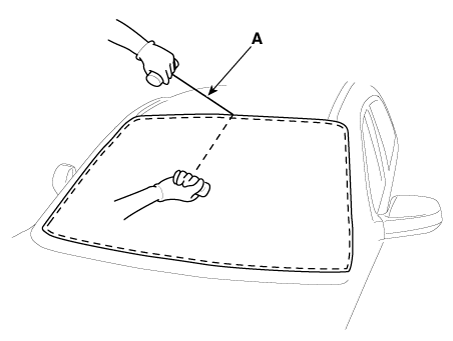
| 8. |
Put in a piano wire (A) through the corner of the windshield glass and
insert wire grips into both ends of the wire.
|
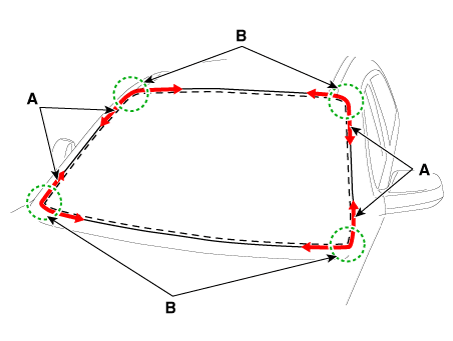
| 9. |
Cut off the sealant on (A-A), (B-B), (C-C), while pulling a piano wire
(A) to the left and right.
|
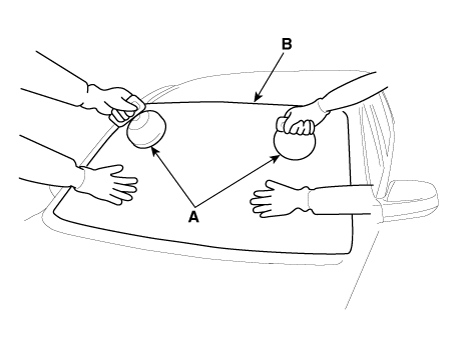
| 10. |
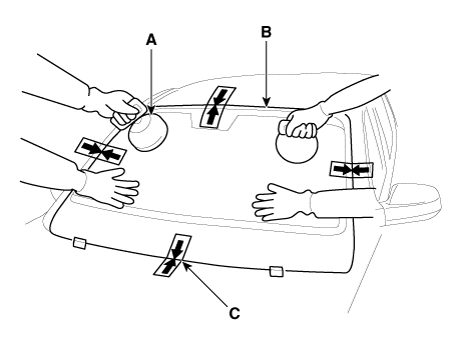
Remove the windshield glass (B) carefully using the glass holder (A).
|
[Installtion]
| 1. |
Using a knife, scrape the remaining sealant around the body panel leaving
about 2mm-thick sealant (0.0079 in.) on the bonding surface. If installing
a new windshield glass, make alignment marks on the windshield glass
and the body.
|
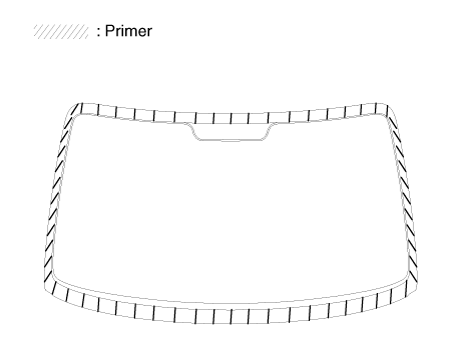
| 2. |
Clean the edges of body panel and windshield glass with alcohol. Apply
glass primer to the edges of windshield glass and attach the molding
onto the edges.
|
| 3. |
Apply the body primer to the bonding surface of body panel.
|
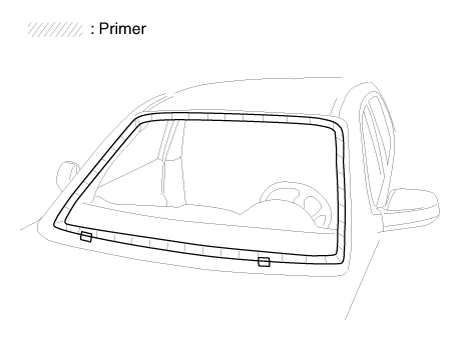
| 4. |
Apply the glass primer to the outer edge of windshield glass.
|
| 5. |
Apply a bead of sealant (B) around the windshield glass (A).
|
| 6. |
Using the glass holder (A), adjust the windshield glass (B) to fit the
alignment marks (C) on the body and lightly push the windshield glass
to make the edges fully seated on the bonding surface of body.
|
| 7. |
Install the windshield side molding (A).
|
| 8. |
To make sure that the applied sealant is completely hardened, leave
the car on a flat surface for at least 4 hours after installing the
windshield glass.
|
| 9. |
Conduct a leak testing.
|
| 10. |
Install the cowl top cover.
(Refer to "Cowl Top Cover")
|
| 11. |
Install the roof side molding.
(Refer to Interior Trim - "Roof Side Molding")
|
| 12. |
Install the inside rear view mirror assembly.
(Refer to Mirror - "Inside Rear View Mirror")
|
| 13. |
Install the front pillar trim.
(Refer to Interior Trim - "Front Pillar Trim")
|

 Tail Gate Window Glass
Components and components location
Components
1. Tailgate window
glass
Repair procedures
Removal
•
Put on gloves to prevent hand injuries...
Other information:
Hyundai i30 (PD) 2018-2025 Service Manual: Description and operating principle
Description and Operation Wireless Power Charger System During ACC or IG ON, battery voltage is supplied to the wireless power charger system to transmit an output of 5 W to mobile phone. Mobile phones certified with the wireless charging standard WPC (Qi 1...
Hyundai i30 (PD) 2018-2025 Service Manual: Components and components location
..
Categories
- Manuals Home
- 3rd Generation i30 Owners Manual
- 3rd Generation i30 Service Manual
- Trip computer
- Engine coolant
- Engine compartment
- New on site
- Most important about car
Panorama sunroof
If your vehicle is equipped with a sunroof, you can slide or tilt your sunroof with the sunroof control lever located on the overhead console.
The ignition switch must be in the ON position before you can open or close the sunroof.
The sunroof can be operated for approximately 30 seconds after the ignition key is removed or turned to the ACC or LOCK(or OFF) position. However, if the front door is opened, the sunroof cannot be operated even within 30 seconds.

Copyright © 2025 www.hi30.net