Hyundai i-30: Storage compartment / Luggage tray, Luggage side tray
Hyundai i30 (PD) 2018-2025 Owner's Manual / Convenient features of your vehicle / Storage compartment / Luggage tray, Luggage side tray
Luggage tray (wagon)
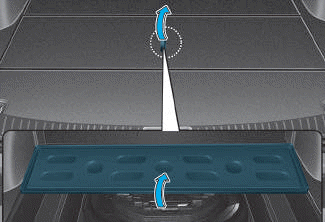
■ Type A
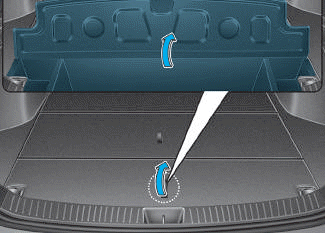
■ Type B
You can place a first aid kit, a reflector triangle (front tray), tools, etc. in the box for easy access.
• Grasp the handle on the top of the cover and lift it.
Luggage side tray (wagon)
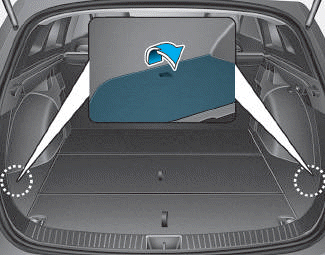
You can use the luggage side tray to store small items.
• To open the cover, pull up the handle and lift the cover.
 Multi box
To open the cover, push the lip of the
cover forward then release. The
cover will open slowly. To close the
cover, push the lip down to the
closed position...
 Interior features
Ashtray
To use the ashtray, open the cover.
To clean the ashtray:
The plastic receptacle should be
removed by lifting the plastic ashtray
receptacle upward after turning the
cover counterclockwise and pulling it
out...
Other information:
Hyundai i30 (PD) 2018-2025 Service Manual: Blower Unit
Components and components location Component Location 1. Blower unit assembly Components 1. Seal 2. Intake duct case 3. Intake actuator 4. Intake door 5. Intake lower case 6...
Hyundai i30 (PD) 2018-2025 Owner's Manual: Changing a tyre with TPMS
If you have a flat tyre, the low Tyre Pressure and Position telltales will come on. We recommend that the system be checked by a HYUNDAI authorised repairer. CAUTION It is recommended that you do not use a puncture-repairing agent not approved by HYUNDAI dealer to repair and/or inflate a low pressure tyre...
Categories
- Manuals Home
- 3rd Generation i30 Owners Manual
- 3rd Generation i30 Service Manual
- Cruise control
- Front windscreen wiper service position
- Brake/clutch fluid
- New on site
- Most important about car
Power windows
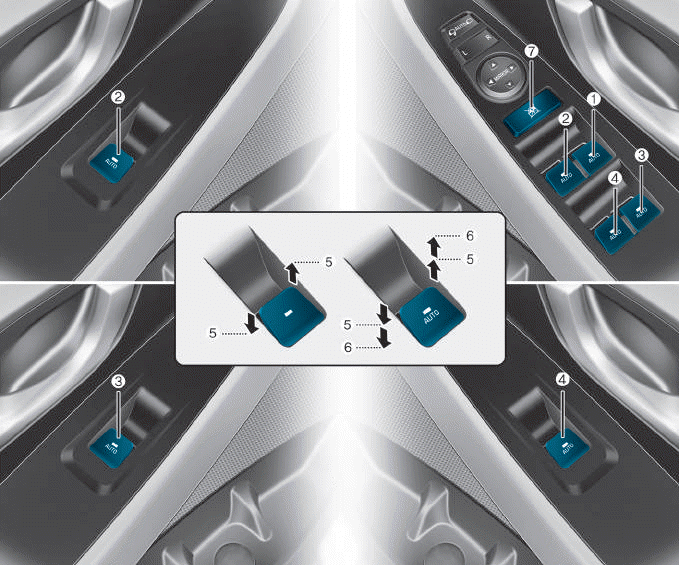
(1) Driver’s door power window
switch
(2) Front passenger’s door power
window switch
(3) Rear door (right) power window
switch
(4) Rear door (left) power window
switch
(5) Window opening and closing
(6) Automatic power window
(7) Power window lock switch

Copyright © 2025 www.hi30.net