Hyundai i-30: Rear Door / Rear Door Trim
Hyundai i30 (PD) 2018-2025 Service Manual / Body (Interior and Exterior) / Rear Door / Rear Door Trim
Components and components location
| Component Location |

| 1. Rear door
trim |
Repair procedures
| Replacement |
|

|

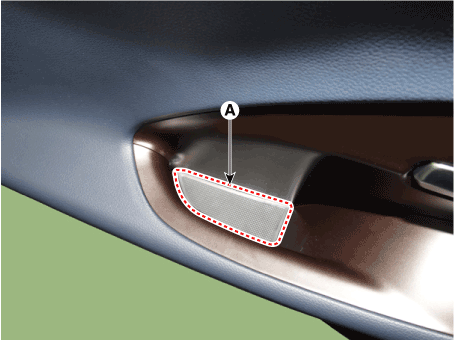
| 1. |
Using a flat-tip or remover, remove the rear door pull cover (A).
|
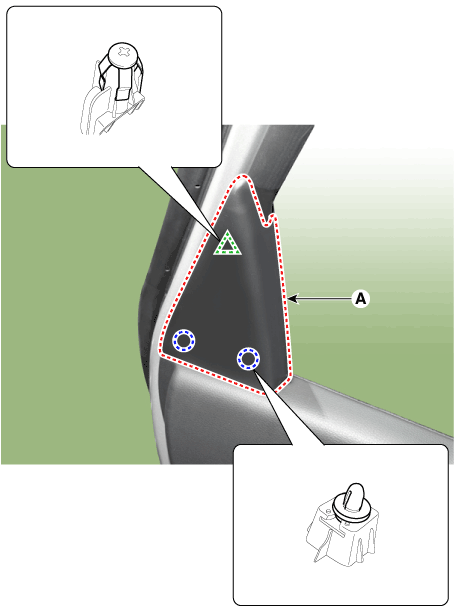
| 2. |
Using a screwdriver or remover, remove the rear door delta inner cover
(A).
|
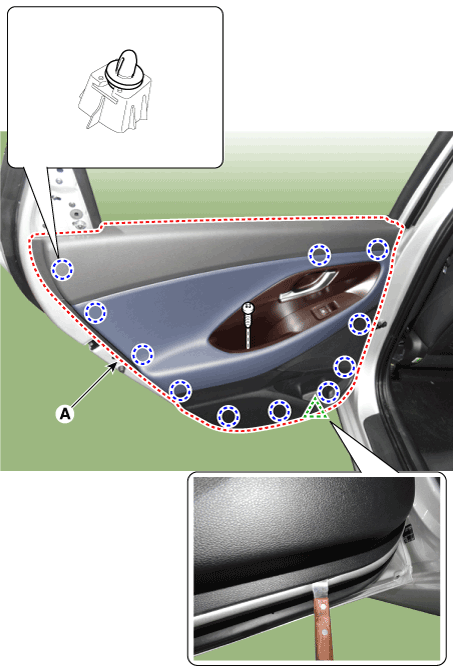
| 3. |
After loosening the mounting screws, remove the rear door trim (A).
|
| 4. |
Remove the rear door inside handle cage (A).
|
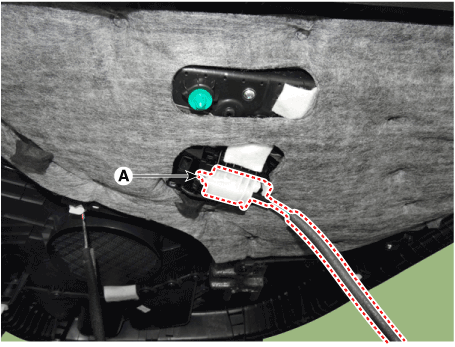
| 5. |
Disconnect the power window switch connector (A).
|
| 6. |
To install, reverse removal procedure.
|

 Repair procedures
Adjustment
Glass Adjustment
•
Check the glass run channel for damage or deterioration, and
replace them if necessary...
 Rear Door Inside Handle
Repair procedures
Replacement
1.
Remove the rear door trim.
(Refer to Rear Door - "Rear Door Trim")
2...
Other information:
Hyundai i30 (PD) 2018-2025 Owner's Manual: Vehicle identification number (VIN), Vehicle certification label, Tyre specification and pressure label
Vehicle identification number (VIN) ■ Frame number The vehicle identification number (VIN) is the number used in registering your vehicle and in all legal matters pertaining to its ownership, etc. The number is punched on the floor under the driver seat...
Hyundai i30 (PD) 2018-2025 Service Manual: Rear Bumper beam Assembly
Components and components location Component Location 1. Rear bumper beam assembly Repair procedures Replacement • Put on gloves to prevent hand injuries...
Categories
- Manuals Home
- 3rd Generation i30 Owners Manual
- 3rd Generation i30 Service Manual
- Recommended lubricants and capacities
- Tyre pressure monitoring system
- Trip computer
- New on site
- Most important about car
Bonnet
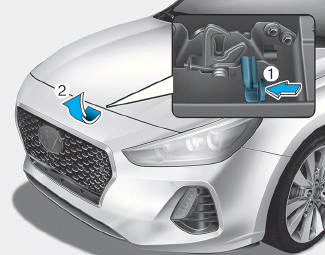
Opening the bonnet
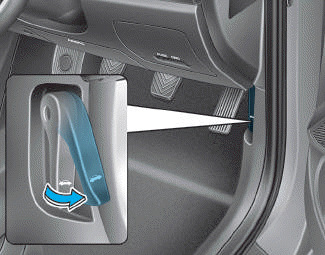
1. Park the vehicle and set the parking brake.
2. Pull the release lever to unlatch the bonnet. The bonnet should pop open slightly.

Copyright © 2025 www.hi30.net