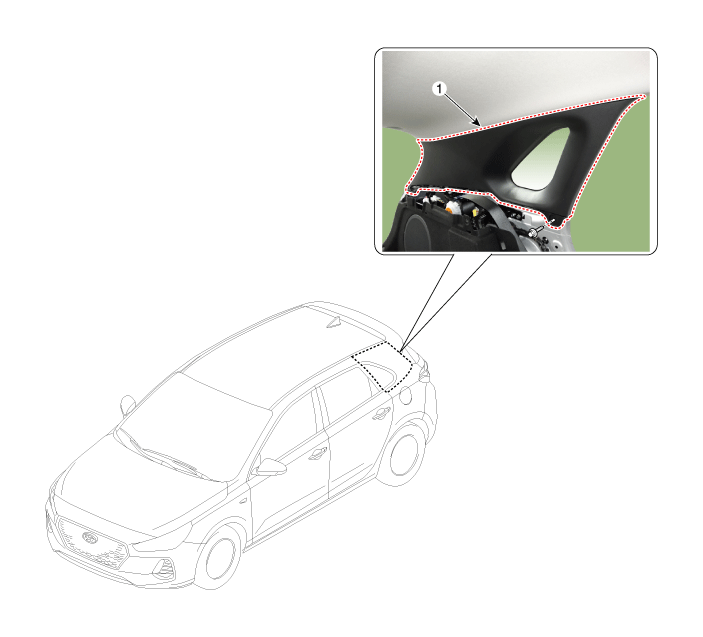
Hyundai i-30: Interior Trim / Rear Pillar Trim
Components and components location
Repair procedures
| •
|
Put on gloves to prevent hand injuries.
|
|
| •
|
When removing with a flat-tip screwdriver or remover, wrap protective
tape around the tools to prevent damage to components.
|
| •
|
When removing the interior trim pieces, use a plastic panel
removal tool not to damage the surface.
|
| •
|
Take care not to bend or scratch the trim and panels.
|
| •
|
Once the rear pillar trim is removed, be sure to replace the
clips with new ones.
|
|
|
1. |
Remove the rear wheel house trim.
(Refer to Interior Trim - "Rear Wheel House")
|
|
2. |
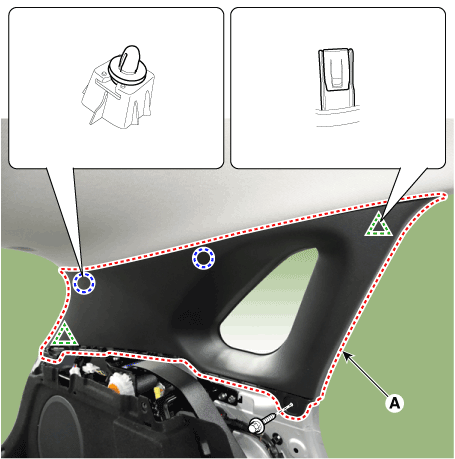
After loosening the mounting bolts, remove the rear pillar trim (A).
|
|
3. |
To install, reverse removal procedure.
|
• |
Replace any damaged clips (or pin-type retainers).
|
|
|
Components and components location
Component Location
1. Luggage side
trim
Repair procedures
Replacement
•
Put on gloves to prevent hand injuries...
Repair procedures
Replacement
•
Put on gloves to prevent hand injuries...
Other information:
Cancelled manually
Depressing the brake pedal.
Pressing the button located on
the steering wheel.
The Smart Cruise Control turns off
temporarily when the Set Speed and
Vehicle-to-Vehicle Distance indicator
on the LCD display turns off...
Schematic diagrams
Circuit Diagram
Description and operation
Description
The multimedia jack on the console upper cover is for customers who like to
listen to external portable music players like the MP3 etc., through the vehicle's
sound system when it is linked to this jack...
Categories
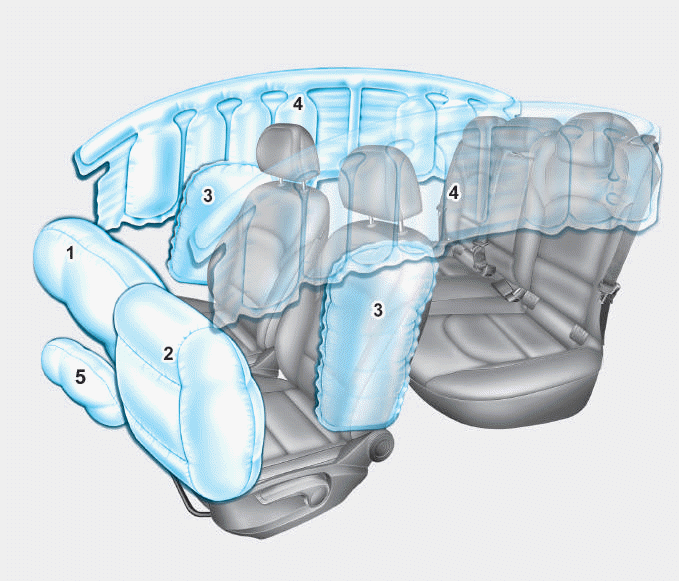
1. Driver’s front air bag
2. Passenger’s front air bag
3. Side air bag*
4. Curtain air bag*
5. Knee air bag*
6. Front passenger air bag ON/OFF
switch
read more


 Luggage Side Trim
 Rear Wheel House Trim