Hyundai i-30: Dual Clutch Transmission Control System / Shift Lever
Components and components location
| Components |
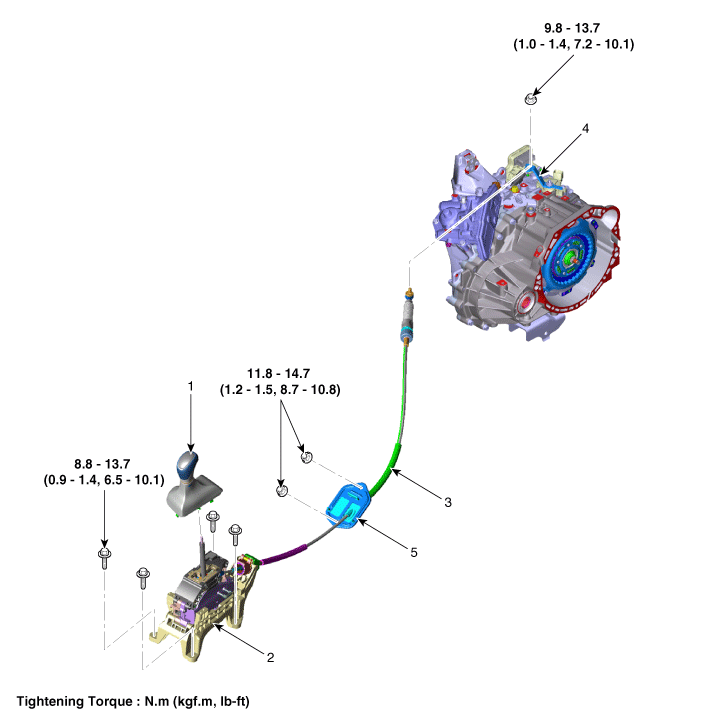
|
1. Shift lever knob & boots assembly 2. Shift lever assembly 3. Shift cable |
4. Manual control lever 5. Shift cable retainer |
Repair procedures
| Removal |
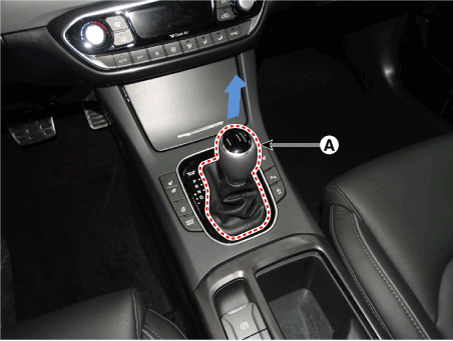
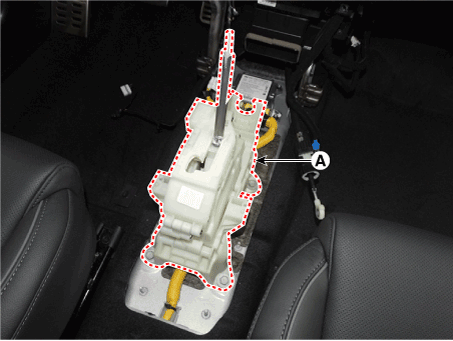
| 1. |
Remove the shift lever knob & boots (A) pull both of it up.
|
| 2. |
Remove the floor console assembly.
(Refer to Body - "Floor Console")
|
| 3. |
Remove the air duct(A).
|

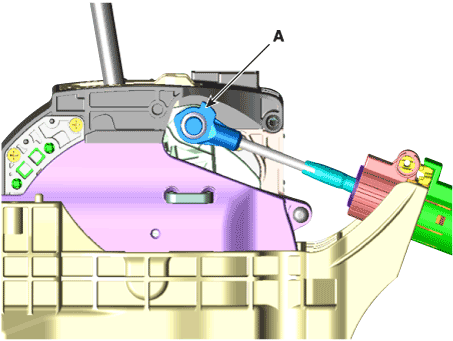
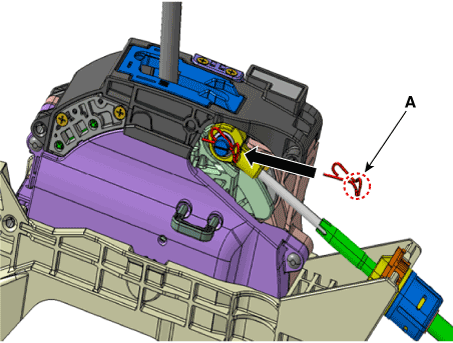
| 4. |
Disconnect the connector (A).
|
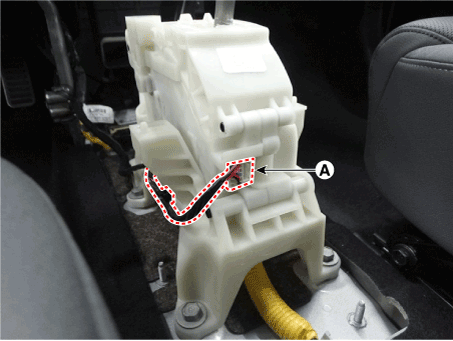
| 5. |
Disconnect the shift cable.
|
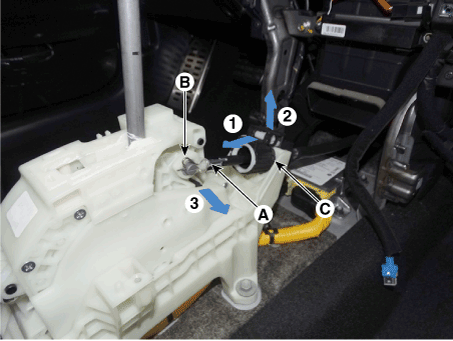
| 6. |
Remove the shift lever assembly (A) after removing the bolts.
|
| Installation |
| 1. |
To install, reverse the removal procedure.
|


 Inhibitor Switch
Description and operation
Description
•
The inhibitor switch is installed on top of transmission, and is connected
to the shift lever through shift cable...
 Shift Cable
Components and components location
Components
1. Shift lever knob & boots assembly
2. Shift lever assembly
3...
Other information:
Hyundai i30 (PD) 2018-2025 Service Manual: Special service tools
Special Service Tools Tool (Number and Name) Illustration Use 09568-1S100 Saperate the ball joint from the front alxe 09546-3X100 Shock absorber lock nut removal tool Used for remove the shock absorber lock nut...
Hyundai i30 (PD) 2018-2025 Owner's Manual: Fuel filler door
Opening the fuel filler door 1. Turn the engine off. 2. Ensure the driver's door is unlocked. 3. Push the fuel filler door near the 3 o'clock position. ■ Type A ■ Type B 4. Pull the fuel filler door (1) out to fully open. 5. To remove the fuel tank cap (2), turn it counterclockwise...
Categories
- Manuals Home
- 3rd Generation i30 Owners Manual
- 3rd Generation i30 Service Manual
- Light bulbs
- Front windscreen wiper service position
- Scheduled maintenance services
- New on site
- Most important about car
Power windows
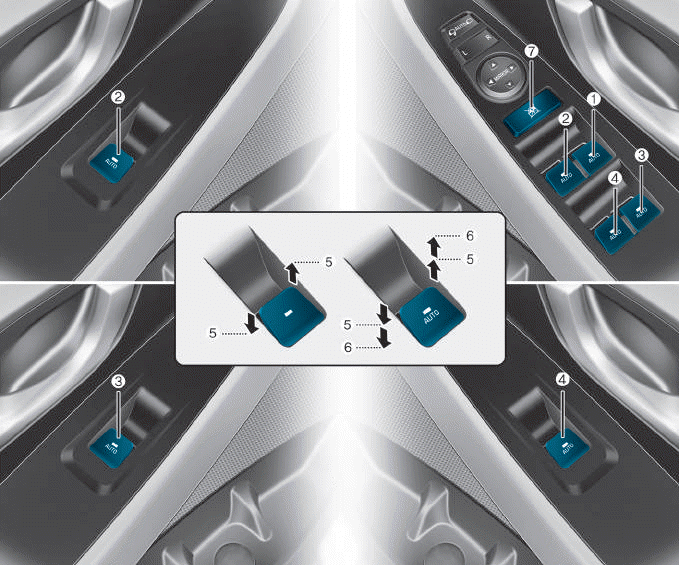
(1) Driver’s door power window
switch
(2) Front passenger’s door power
window switch
(3) Rear door (right) power window
switch
(4) Rear door (left) power window
switch
(5) Window opening and closing
(6) Automatic power window
(7) Power window lock switch

Copyright © 2025 www.hi30.net