Hyundai i-30: Dual Clutch Transmission Control System / Shift Cable
Components and components location
| Components |
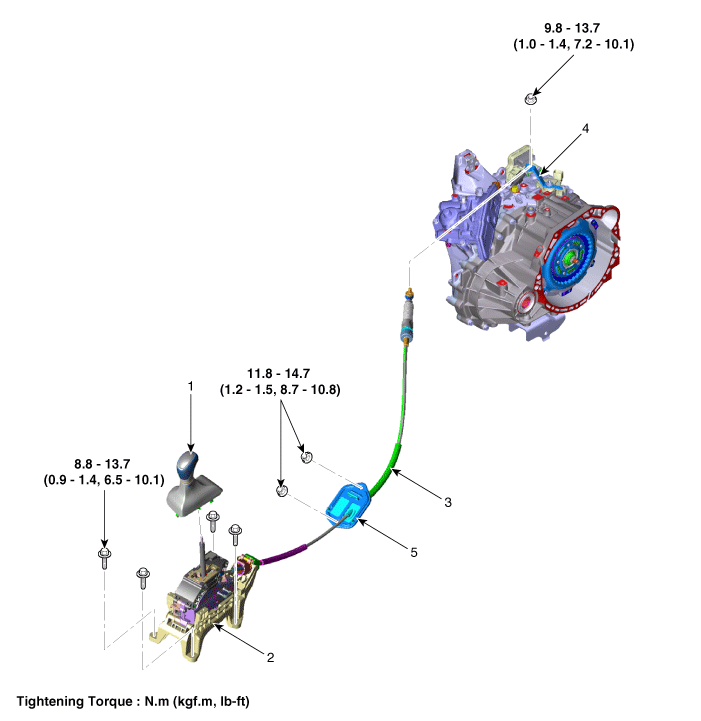
|
1. Shift lever knob & boots assembly 2. Shift lever assembly 3. Shift cable |
4. Manual control lever 5. Shift cable retainer |
Repair procedures
| Removal |
| 1. |
Remove the air cleaner assembly and air duct.
(Refer to Engine Mechnical System - "Air cleaner")
|
| 2. |
Remove the battery and tray.
(Refer to Engine Electrical System - "Battery")
|
| 3. |
Remove the ECM.
(Refer to Engine Control System - "ECM")
|
| 4. |
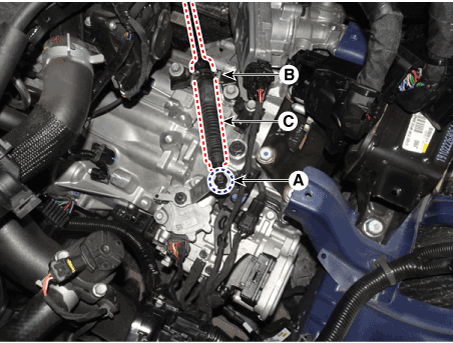
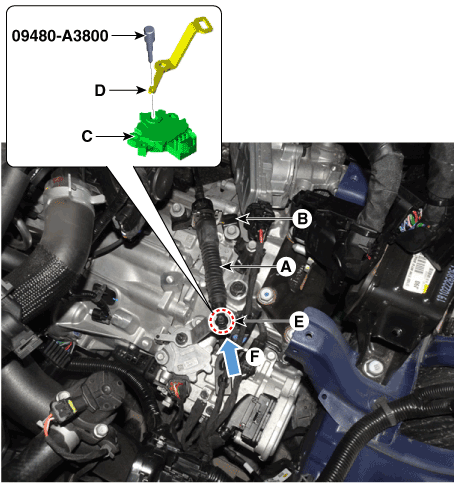
Remove the shift cable (C) from the cable bracket (B), after loosening
the mounting nut (A).
|
| 5. |
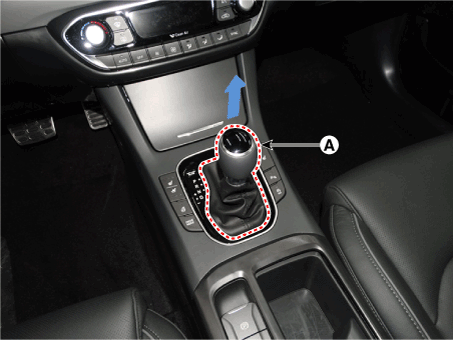
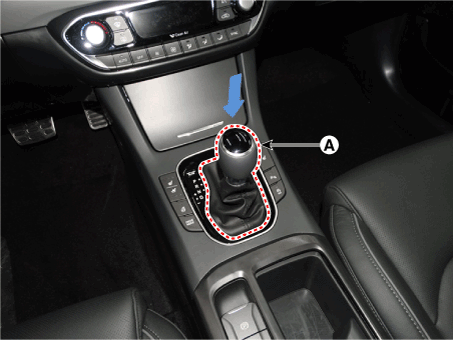
Remove the shift lever knob & boots (A) pull both of it up.
|
| 6. |
Remove the floor console assembly.
(Refer to Body - "Floor Console")
|
| 7. |
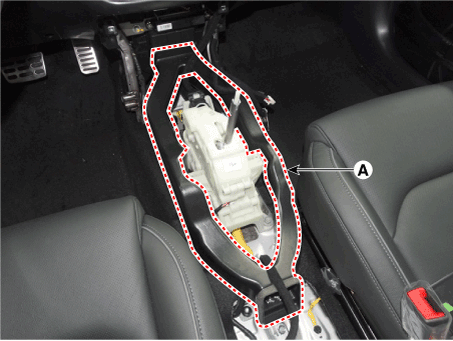
Remove the air duct(A).
|
| 8. |
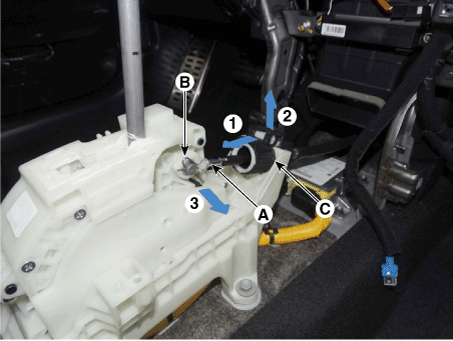
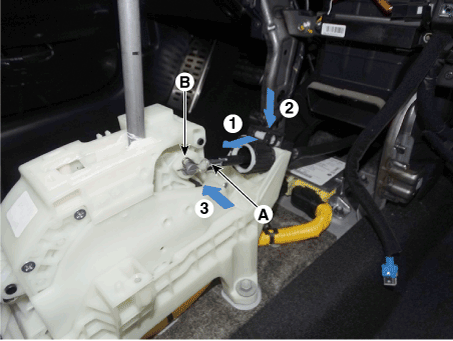
Disconnect the shift cable.
|
| 9. |
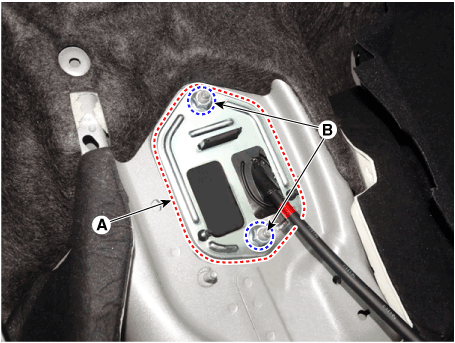
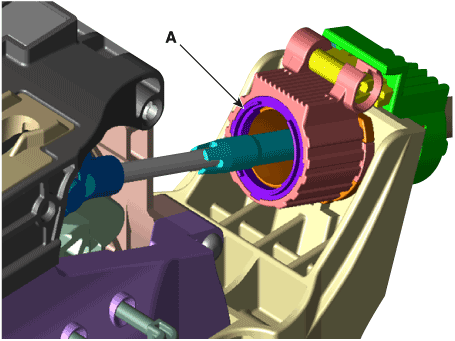
Remove the retainer (A) by loosening the nuts (B-2ea).
|
| 10. |
Remove the shift cable from the vehicle.
|
| Installation |
| 1. |
Install the retainer (A) and then tighten the nut (B-2ea).
|
| 2. |
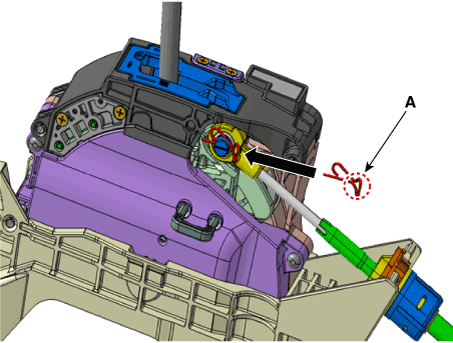
Install the shift cable (B) and then fix the snap pin (A).
|
| 3. |
Install the air duct (A).
|
| 4. |
Install the floor console assembly.
(Refer to Body - "Floor Console")
|
| 5. |
Install the shift lever knob & boots (A).
|
| 6. |
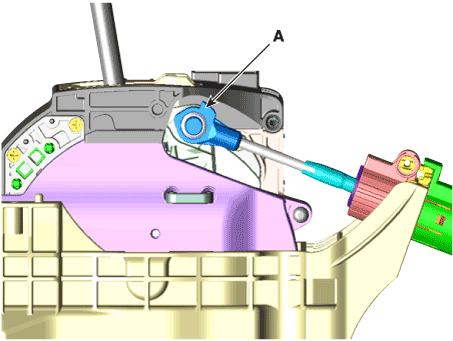
Install the shift cable (A) in the cable bracket (B).
|
| 7. |
Align the hole (C) in the manual control lever with the "N" position
hole (D) of the inhibitor switch and then insert the inhibitor switch
guide pin (SST No.:09480-A3800).
|
| 8. |
Lightly tighten the nut (E) after connected the shift cable (B) in the
manual control lever.
|
| 9. |
Push shift cable (B) lightly to "F" direction shown to eliminate free
play of shift cable.
|
| 10. |
Tighten the nut (E) with the specified torque.
|
| 11. |
Remove the inhibitor switch guide pin (SST No.:09480-A3800) from the
hole.
|
| 12. |
Install the battery and tray.
(Refer to Engine Electrical System - "Battery")
|
| 13. |
Install the ECM.
(Refer to Engine Control System - "ECM")
|
| 14. |
Install the air cleaner assembly and air duct.
(Refer to Engine Mechnical System - "Air cleaner")
|
 Shift Lever
Components and components location
Components
1. Shift lever knob & boots assembly
2. Shift lever assembly
3...
Other information:
Hyundai i30 (PD) 2018-2025 Service Manual: Timing Chain
Components and components location Components 1. Timing chain 2. Timing chain cam guide 3. Timing chain guide 4. Timing chain tensioner arm 5. Timing chain tensioner Repair procedures Removal 1...
Hyundai i30 (PD) 2018-2025 Owner's Manual: Interior lights
NOTICE Do not use the interior lights for extended periods when the engine is turned off otherwise the battery will discharge. WARNING Do not use the interior lights when driving in the dark.The interior lights may obscure your view and cause an accident...
Categories
- Manuals Home
- 3rd Generation i30 Owners Manual
- 3rd Generation i30 Service Manual
- Shift-lock system. Shift-lock release
- Battery replacement
- Brake/clutch fluid
- New on site
- Most important about car
Bonnet
Opening the bonnet
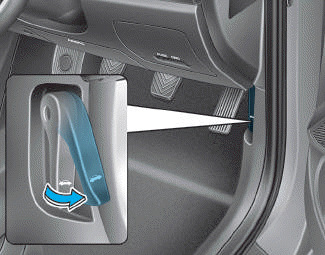
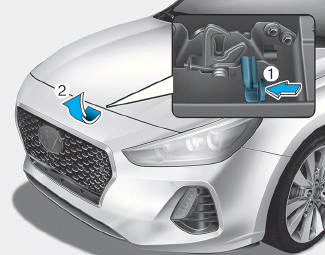
1. Park the vehicle and set the parking brake.
2. Pull the release lever to unlatch the bonnet. The bonnet should pop open slightly.
Copyright © 2025 www.hi30.net

