Hyundai i-30: Driveshaft Assembly / TJ Joint
Components and components location
| Components |
| Driver driveshaft |
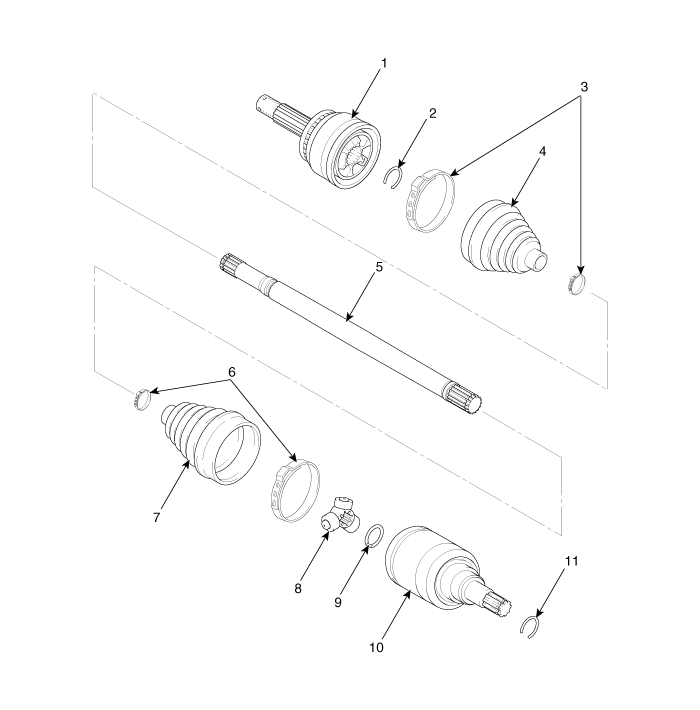
| 1. BJ assembly
2. BJ circlip 3. BJ boot band 4. BJ boot |
5. Shaft 6. TJ boot band 7. TJ boot 8. Spider assembly |
9. Snap ring 10. TJ housing 11. Circlip |
| Passenger driveshaft |
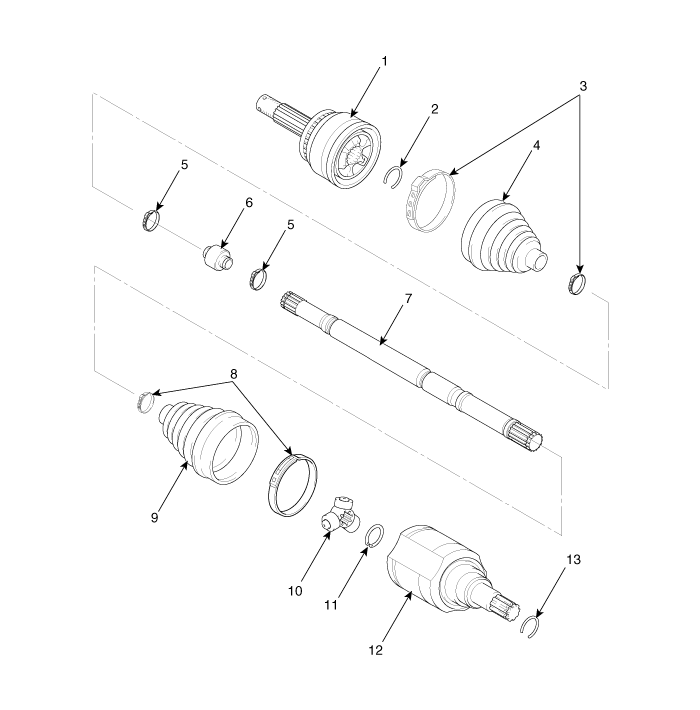
| 1. BJ assembly
2. BJ circlip 3. BJ boot band 4. BJ boot 5. Dynamic damper band |
6. Dynamic damper 7. Shaft 8. TJ boot band 9. TJ boot |
10. Spider assembly 11. Snap ring 12. TJ housing 13. Circlip |
Repair procedures
| Disassembly |
|

| 1. |
Remove the Front Driveshaft.
(Refer to Driveshaft Assembly - "Front Driveshaft")
|
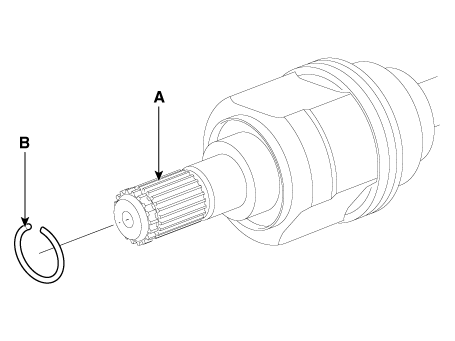
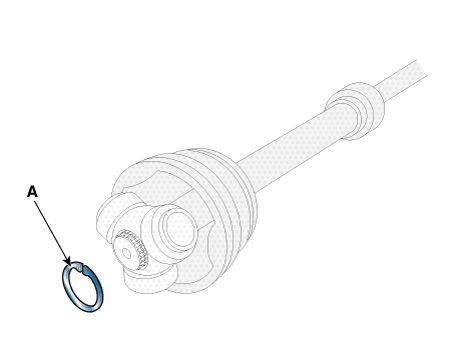
| 2. |
Remove the housing circlip (B) from the driveshaft spline (A).
|
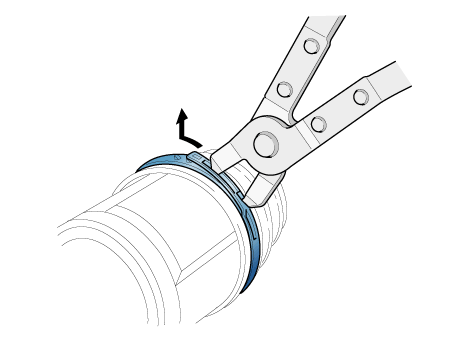
| 3. |
Remove both boot bands from the TJ housing.
|
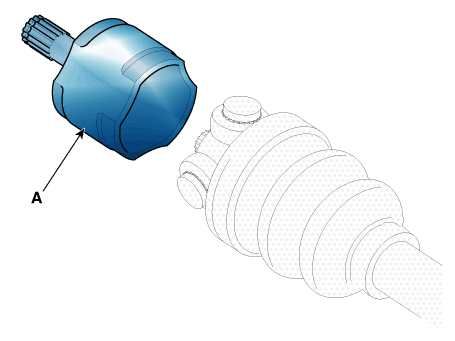
| 4. |
Remove the TJ housing (A).
|
| 5. |
Remove the snap ring (A) from the shaft.
|
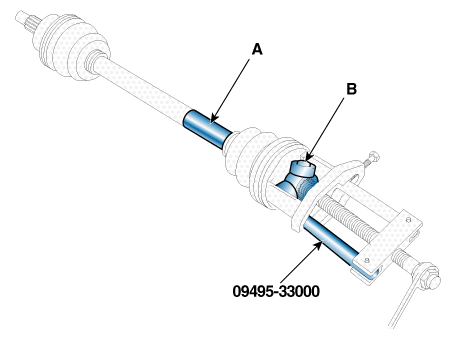
| 6. |
Remove the spider assembly (B) from the driveshaft (A) using the special
tool SST (09495-33000).
|
| 7. |
Clean the spider assembly.
|
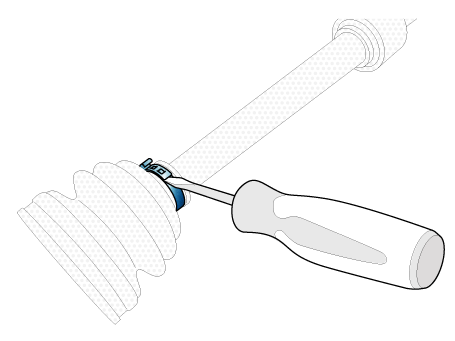
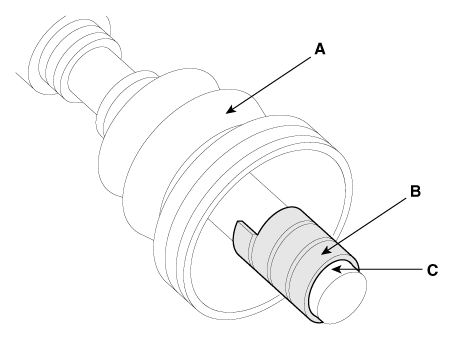
| 8. |
Remove the TJ boot (A).
|
| Inspection |
| 1. |
Check the driveshaft boots for damage and deterioration.
|
| 2. |
Check the driveshaft spline for wear or damage.
|
| 3. |
Check that there is no water or foreign material in the joint.
|
| 4. |
Check the spider assembly for roller rotation, wear or corrosion.
|
| 5. |
Check the groove inside the joint case for wear or corrosion.
|
| 6. |
Check the dynamic damper for damage or cracks.
|
| Reassembly |
| 1. |
Wrap tape around the driveshaft spline(TJ) to prevent damage to the
boot.
|
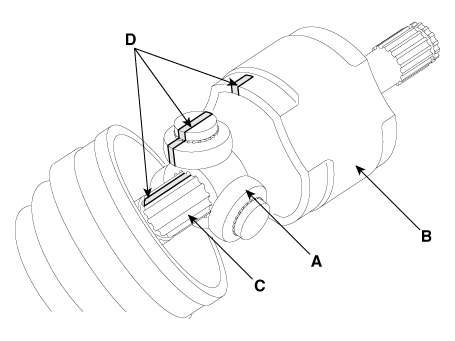
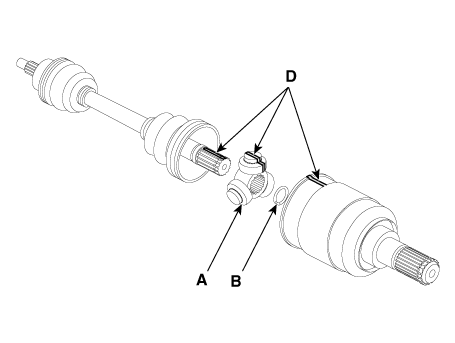
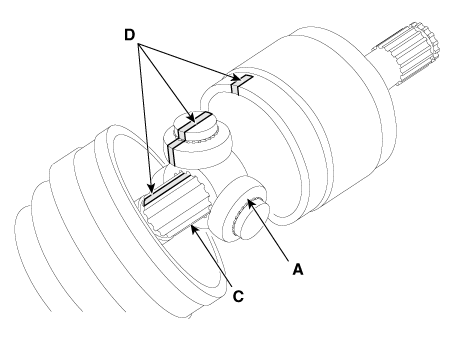
| 2. |
Using the alignment marks (D) made during disassembly as a guide, install
the spider assembly (A) and snap ring (B) on the driveshaft splines
(C).
|
| 3. |
Add specified grease to the joint boot as much as it was wiped away
at inspection.
|
| 4. |
Install the both boot band.
|
| 5. |
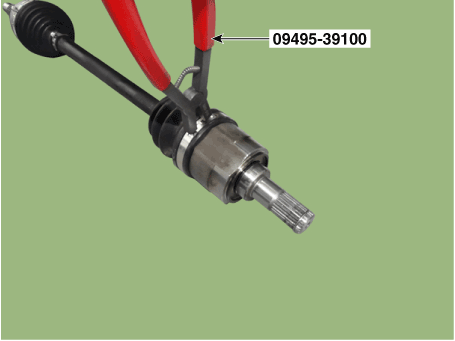
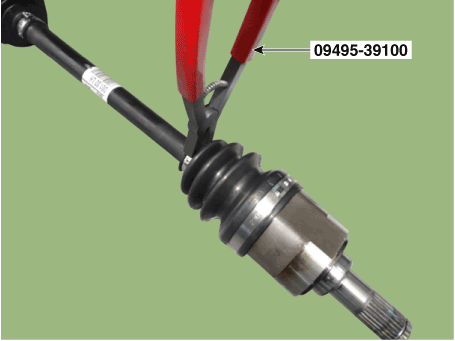
Using the SST (09495-39100), secure the TJ boot bands.
|
| 6. |
Install the front driveshaft.
(Refer to Driveshaft Assembly - "Front Driveshaft")
|
| 7. |
Check the front alignment.
(Refer to Suspension System - "Front Alignment")
|
 Front Driveshaft
Components and components location
Components
1. Driveshaft
(LH)
2. Dynamic damper
3. Driveshaft
(RH)
Repair procedures
Removal
1...
 Dynamic Damper
Components and components location
Components
1. BJ assembly
2. BJ circlip
3. BJ boot band
4. BJ boot
5...
Other information:
Hyundai i30 (PD) 2018-2025 Owner's Manual: Charging System Warning Light. Engine Oil Pressure Warning Light. Low Fuel Level Warning Light
Charging System Warning Light This warning light illuminates: • When there is a malfunction with either the alternator or electrical charging system. If there is a malfunction with either the alternator or electrical charging system: 1...
Hyundai i30 (PD) 2018-2025 Owner's Manual: Turn signals and lane change signals
To signal a turn, push down on the lever for a left turn or up for a right turn in position (A). To signal a lane change, move the turn signal lever slightly and hold it in position (B).The lever will return to the OFF position when released or when the turn is completed...
Categories
- Manuals Home
- 3rd Generation i30 Owners Manual
- 3rd Generation i30 Service Manual
- Drive mode integrated control system
- Front windscreen wiper service position
- FCA sensor
- New on site
- Most important about car
Turn signals and lane change signals
To signal a turn, push down on the lever for a left turn or up for a right turn in position (A). To signal a lane change, move the turn signal lever slightly and hold it in position (B).The lever will return to the OFF position when released or when the turn is completed.

Copyright © 2025 www.hi30.net